
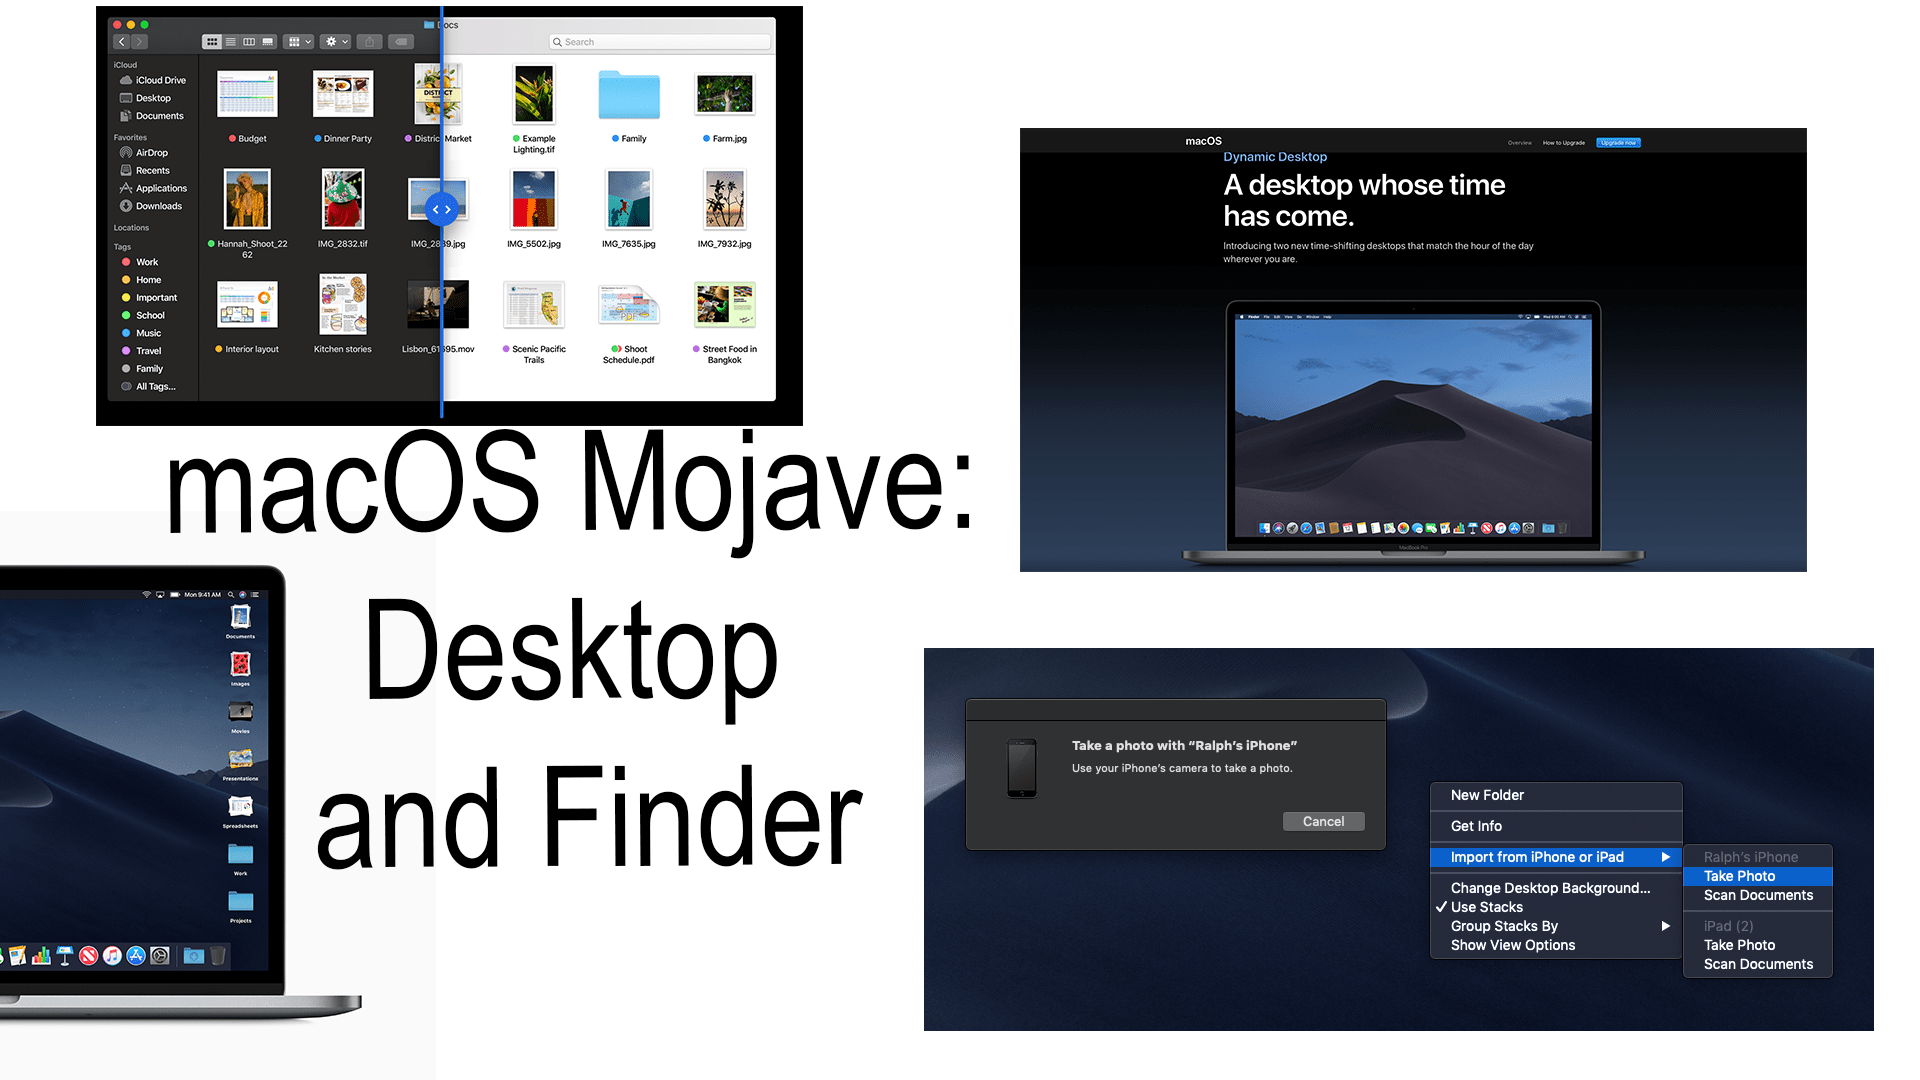
Apple released macOS Mojave or macOS 10.14 on September 24. With it came some great changes and improvements. Click to see the release notes that I shared at the beginning of the week. For this article, I am going to focus on the changes that came to the desktop and Finder.
Dynamic Desktop
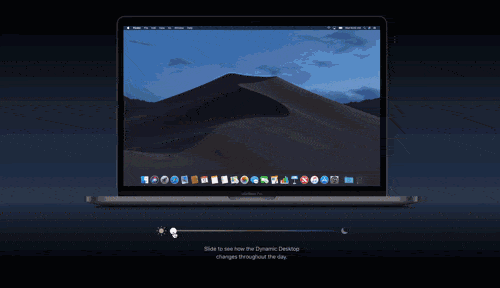
Let’s start with the dynamic desktop. With a dynamic desktop, like the image above, your desktop will change based on the time of the day. For now, you have two options the Mojave desert and solar gradients. With the Mojave desert, you will see the sunrise to the left, the sun will then revolve around the dunes, just outside of the frame casting different shadows upon the dunes throughout the day then set to the right of your screen and then going through the night. Solar gradients are like the upper atmosphere as the sun rises and sets. To enable this go to the Desktop and Screen Saver preferences pane within System Preferences. Than on the Desktop tab go to the “Desktop Pictures” photo album at the top will be a section called “Dynamic Desktop” from there you can choose between the Mojave desert and solar gradients. The Mojave desert can also be found as a still desktop picture, to find that and other stills go to the “Desktop Pictures” group located under the “Dynamic Desktop” group.
Stacks
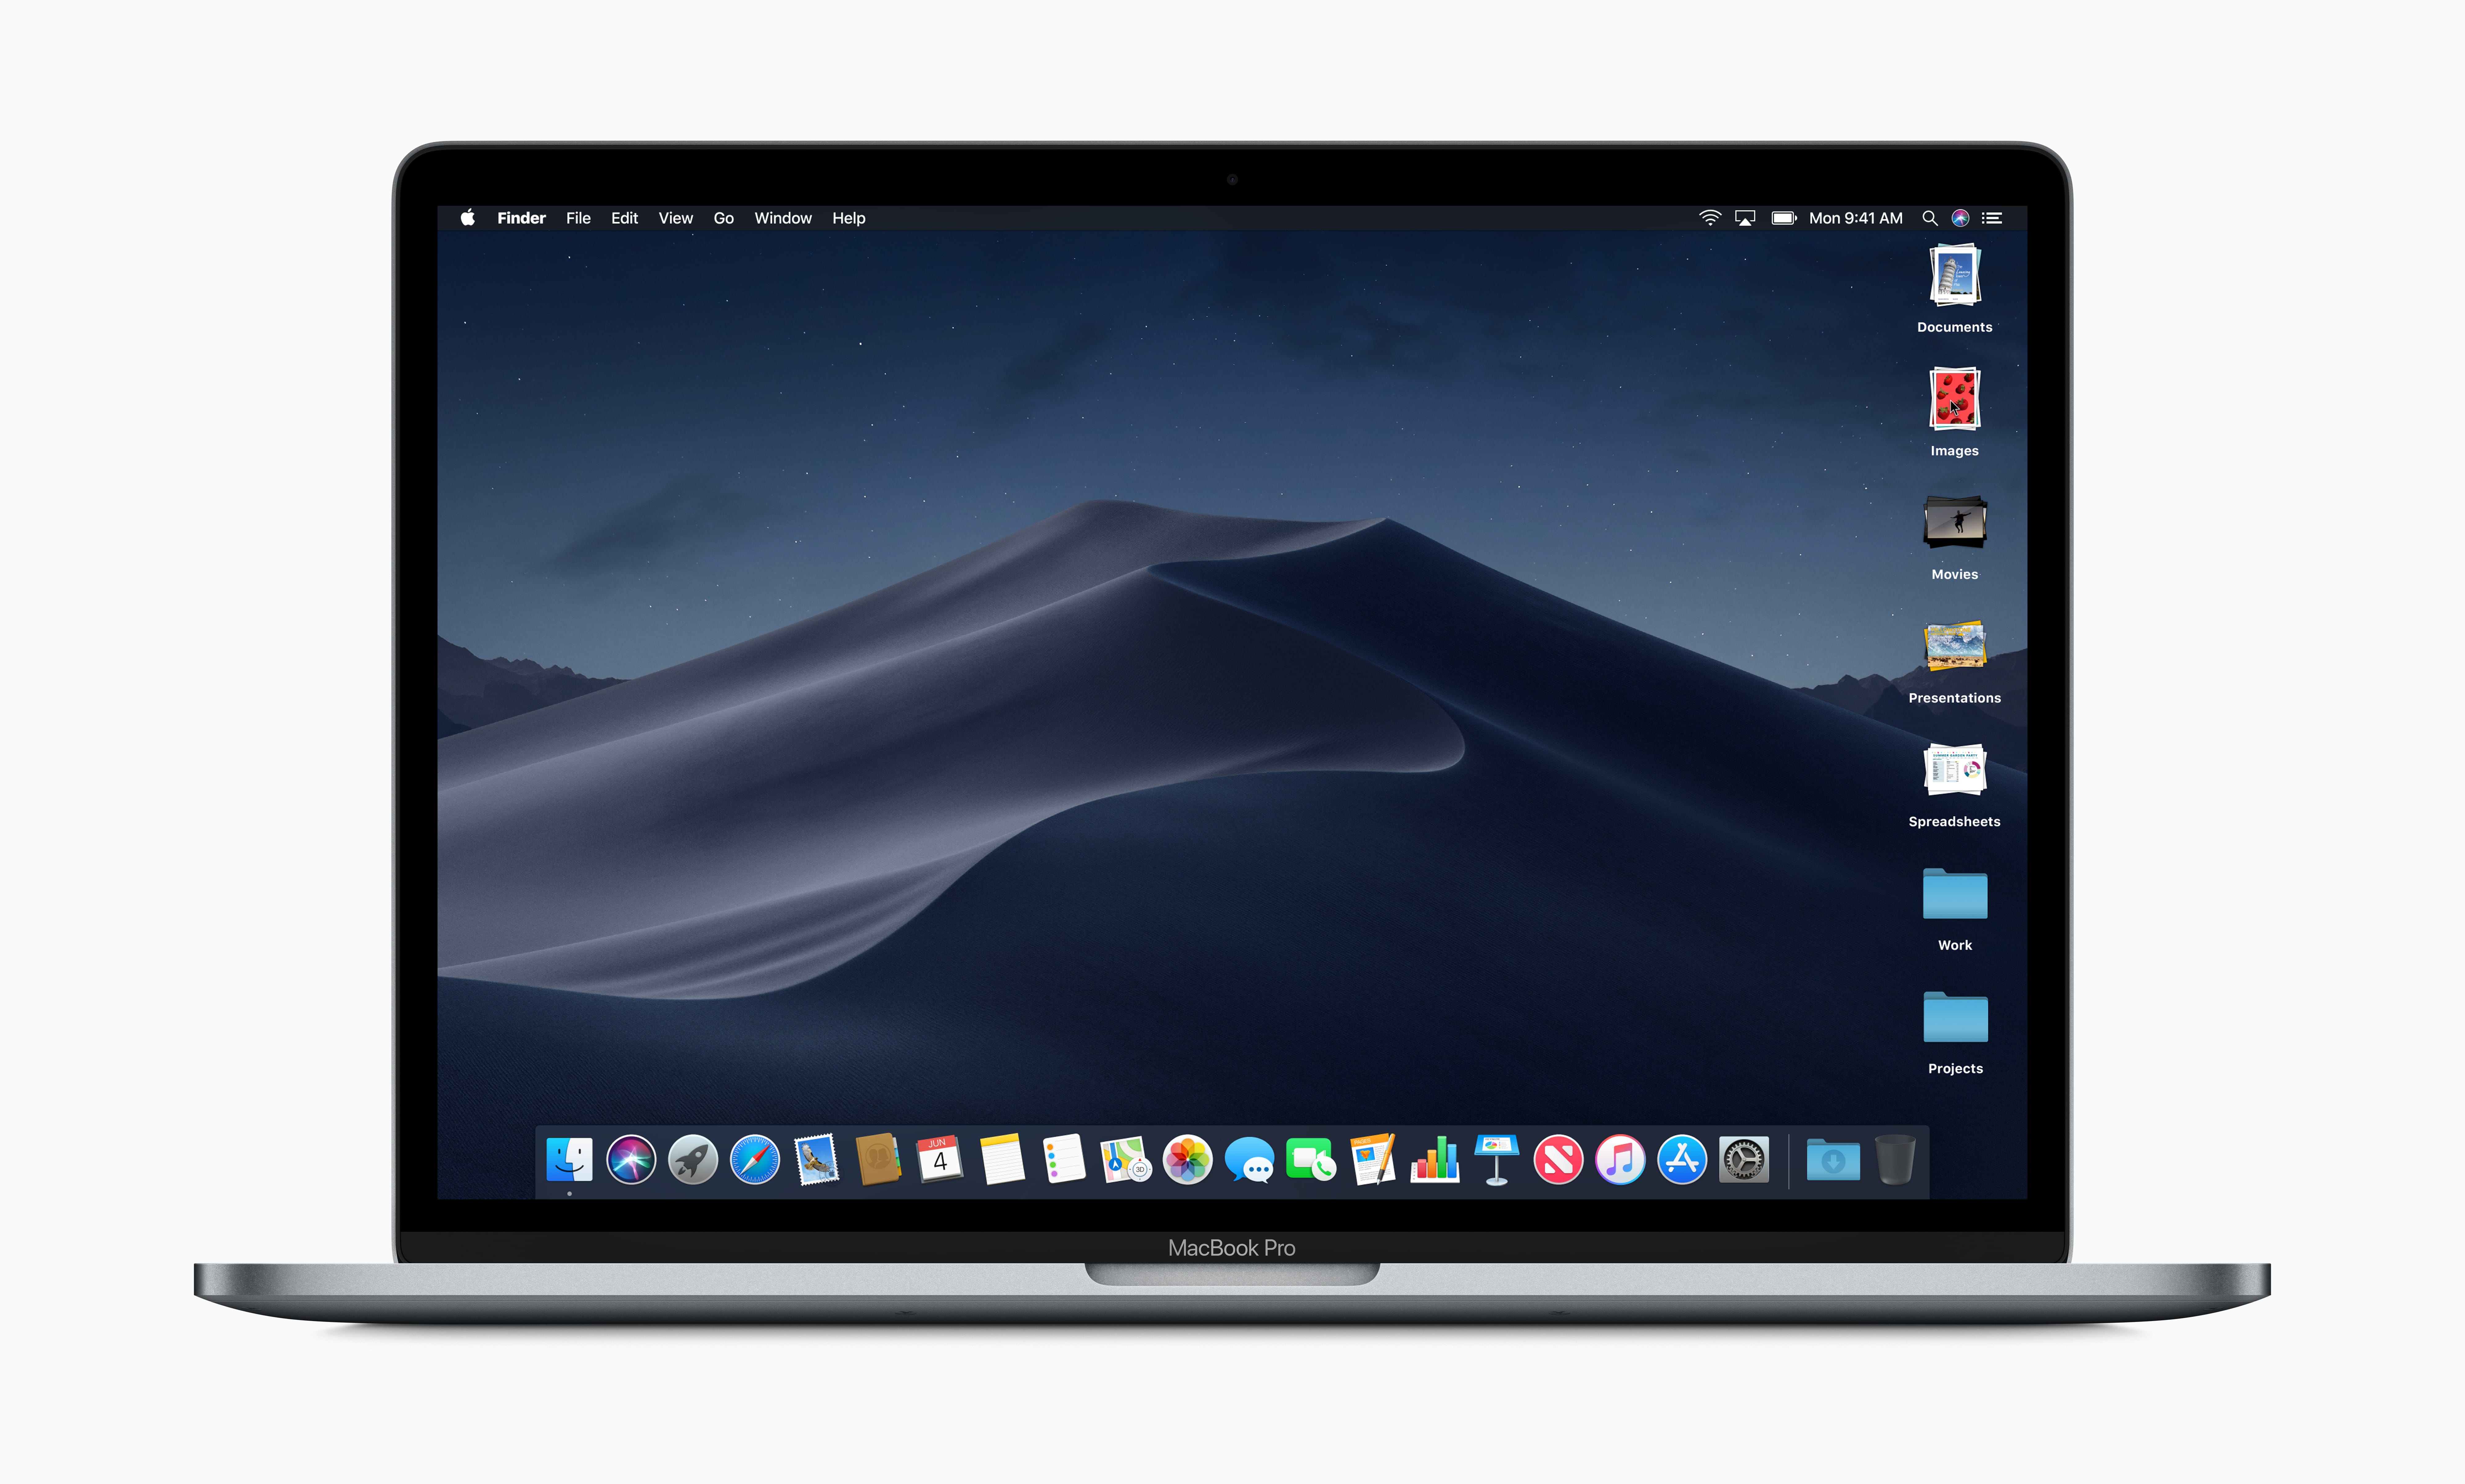
Your desktop may be one of the easiest places to access. When you move your windows out of the way there it is, when you look Finder there it is on the sidebar. That being said this also the place that you save all of your files for easy access. That means that you will have a lot of files on your desktop that are messy and unorganized and take up a lot of space. You could sort your desktop but then they will still be taking up area. To solve this you can use the new stacks feature of your desktop. To enable this right-click on your desktop and toggle on “Use Stacks” then right-click again and check out the “Group Stacks By” submenu and choose an option. This will group files together that follow the certain specification that you chose from that list.
Finder Gallary View and Preview Pane
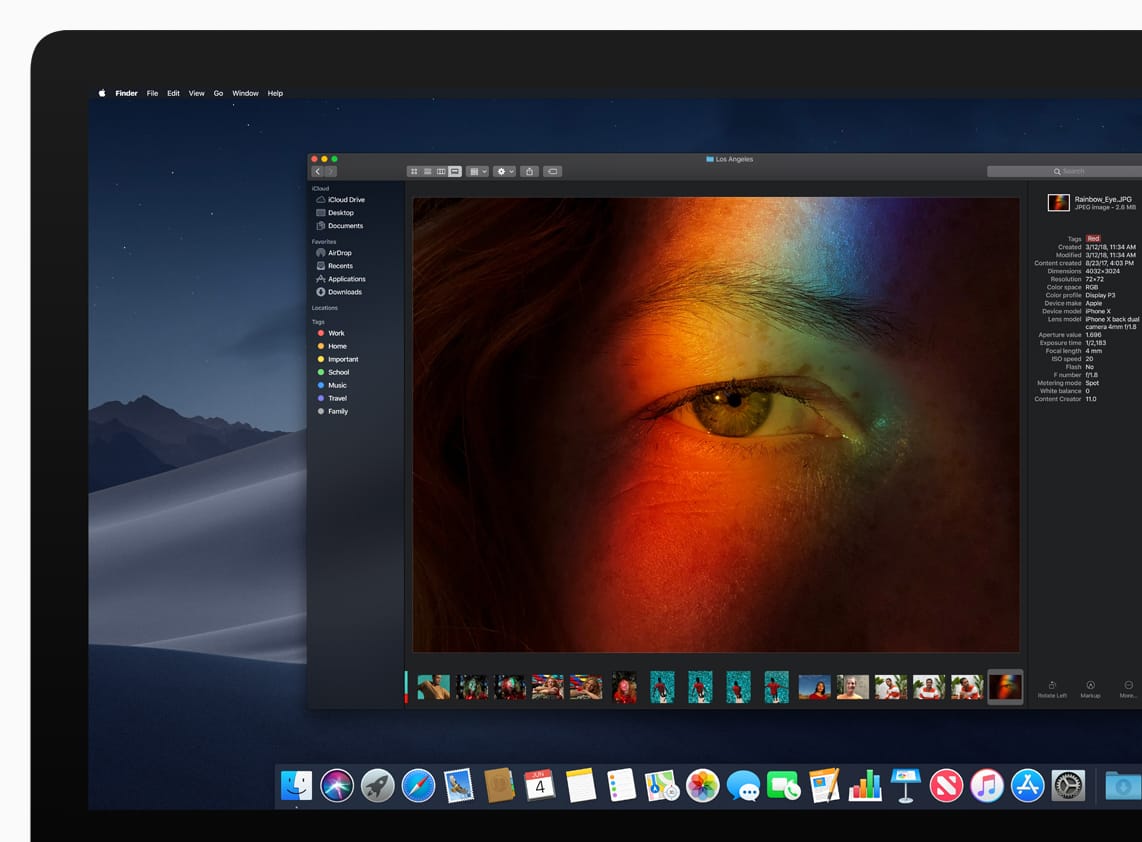
For a long time you there has been a gallery view in your Finder window. With macOS Mojave, it gets a well-deserved update. When in this view you will, of course, see a large preview of whatever file you have selected. Under the preview is a row of all of your files in the opened folder. To the left of all of that is the preview pane with more information than before. In this update Finder will be able to read all of the metadata, or file information, for and images, videos, audio clips, etc. You will find this same detailed list if you use the command cmd+i or Get Info. This pane can be enabled no matter which Finder view you are currently using. To enable it to click on the “View” tab at on the top menu bar, then toggle “Show Preview”. Alternatively, you can use the command cmd+shift+p to enable and disable the pane easier. In addition to viewing a preview of the file and the metadata you also have limited editing options. For images you can rotate, markup, or choose another application to edit the image in, you can trim audio and video clips, convert documents to a PDF, markup PDFs, and so much more.
Import from iPhone or iPad
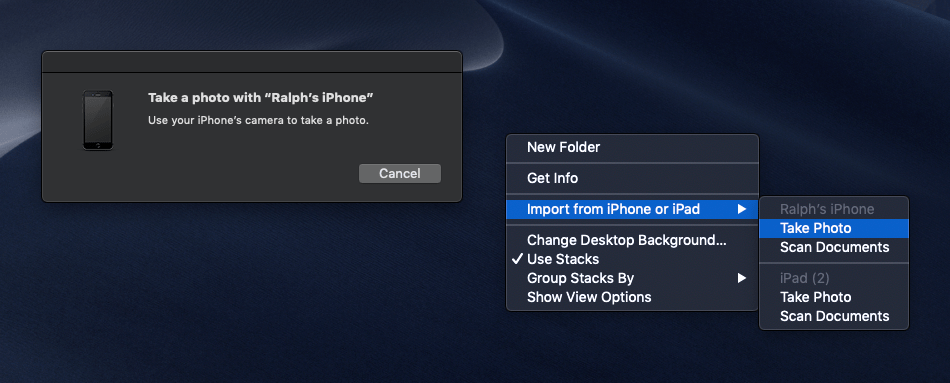
Apple has once again added another great continuity feature to better connect your mobile iPad and iPhone further syncing you into the Apple ecosystem. To use this feature you will, of course, need a Mac and either an iPad or iPhone running iOS 12, and all devices bust be using the same iCloud account. Now that you have everything that you need right-click anywhere on your desktop or on a finder window. In the right-click menu go to the “Import from iPhone or iPad” submenu. Each device that you have will get its own group. In each group is “Take Photo” and “Scan Documents”. Click on the option that associates what you need an image of and select it from the list. You will then get a popup that your Mac is waiting for a picture from your iPhone. Now on that selected iPhone or iPad open the camera app if it hasn’t already. First I will start by taking a picture. Once opened you will see that it transforms and many of your options have disappeared and you’re only left with the flash options, flip camera, zoom, and the shutter. Take your picture. If you don’t like it then click the “Retake” button to try again, if you do tap “Use Photo”, you will then find that that image appears in the location that you right-clicked in. You other option is to scan a document. Following the same steps choose scan document from the submenu then continue on your iDevice. This time you are able to add filters like black and white or grayscale. Next to the effects is “Auto” if you see this then that means that your phone will autodetect the paper, if you don’t want this then you can tap on it to change to manual mode. Once you take the image move the bubbles to the 4 corners of your paper if they are not already there. If you don’t like it then click “Retake”, and if you do click “Keep Scan” either way you will be prompted to take another image. Repeat these steps until all of your pages have been scanned. Then tap on “Save” next to the shutter button and notice that that document is saved as a PDF in the same folder that you right-clicked in.
Helpful Links
Subscribe: Apple Podcasts | Google Podcasts | Spotify | Amazon Music | Android | Pandora | Blubrry | Email | TuneIn | RSS | More