
A couple of weeks ago, I made a video about the shortfalls of modern-day smart devices, and some struggles you may run into as a new user trying to understand the landscape. I will leave a link to that video below. One thing we briefly took a look at was HomeKit, Apple’s smart home ecosystem. Today we will take an in-depth look at what HomeKit is, how it works, and the benefits of integrating into the Apple ecosystem.
Before getting into the video, be sure to like and subscribe, and hit the bell icon you get notified when we release a new video.
I’m sure you’ve met Amazon’s Alexa and know of Google’s Assistant. Well, here’s a quick summary of smart devices on those platforms. You buy a smart home device, like a TP-Link smart plug. You download the corresponding app, in this case, Kasa, create or sign in to your account, and follow the configuration wizard. Simple enough. Now it’s time to link your smart device’s app to your voice assistant of choice. In the case of both Google and Amazon, you add a device and choose the brand. Then you’re brought to a sign-in screen for you to link your smart device’s account to your Alexa or Google Home account. And voila, you can control your smart home accessories through your voice assistant. After your account is linked, new devices added through that brand’s app will automatically be added to your voice assistant.
Now you have three options for controlling your smart devices. The most convenient way is through a voice assistant. You can say, “Alexa, turn on my lights” or “Ok Google, turn off the lights.” But if you want more manual control, you can use a mobile app. One of your options is through that brand’s app. For example, if you have a TP-Link smart plug, you would go to the Kasa app to control it. This option may be cumbersome, especially if you have multiple smart products across multiple brands because that means more apps to sift through. Alternatively, you can use the Alexa and Google Home apps, which provide convenient control to all of your smart devices. But, there’s one ecosystem missing, Apple’s HomeKit.
Like with Alexa integration with the Amazon ecosystem and Google Assistant’s integration with the Google ecosystem, HomeKit integrates your smart devices into your Apple Ecosystem.
It all starts with the Home app, which you can find on your iPhone, Apple Watch, iPad, Mac, and even your AppleTV. You can create houses and rooms to organize your devices. Unlike Alexa and Google, adding a device usually doesn’t require you to install an app or skill. And, since the Home app is integrated into your Apple devices, it makes accessing your smart devices simpler via Siri, Control Center, or the Home app.
With that quick summary out of the way, let’s take an in-depth look at the Home app through an iPhone.
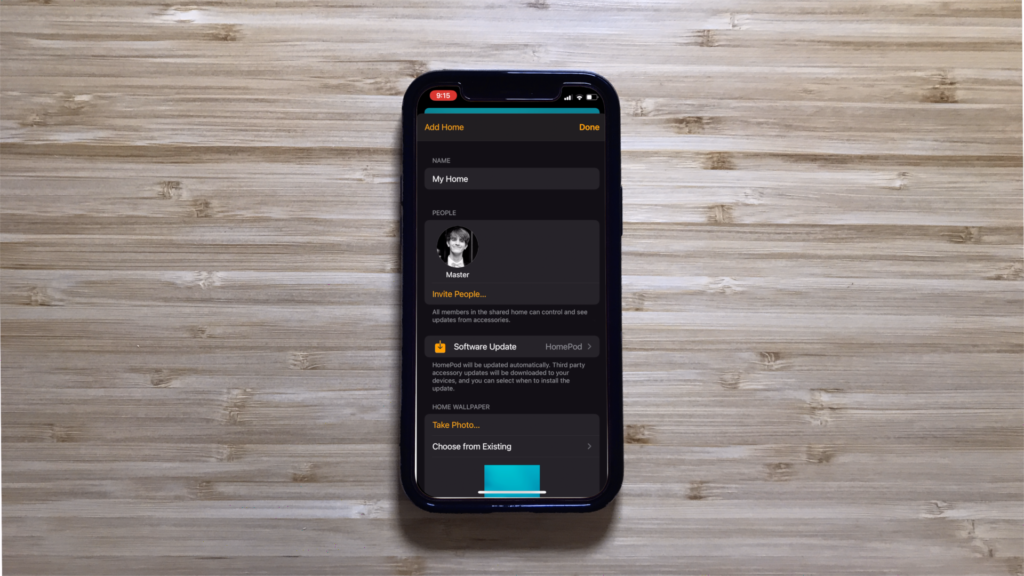
When opening the Home app for the first time, you will get a splash screen you can skip by clicking continue. From there, you see your home that was automatically setup. First, you will probably want to change your home settings. So, click the home icon at the top left and choose “Home Settings.” From this page, you can change its name, invite others to join, change your wallpaper, and add some notes. If you are managing smart devices across multiple buildings, you can create more than one home by tapping the “Add Home” button at the top.

Before we start managing rooms, we need to add an accessory. First, make sure your smart device is compatible with HomeKit by checking the manual. After confirming you have a compatible device, tap on the plus (+) in the top corner, then select “Add Accessory.” From the popup, you can scan the barcode found on your smart device or hold your iPhone near the accessory. If those options don’t work, tap “I Don’t Have a Code or Cannot Scan,” this may bring up your accessory, as it did for me. If your device still doesn’t come up tap, “My Accessory Isn’t Shown Here,” this will give you some troubleshooting tips. For me, I’m going to select my HomeKit compatible smart speaker, which is AirPort Express.
After selecting the device, it’s time to assign it to a room. Scroll through the list and choose a room that best fits its location. If your room name isn’t listed, you can select “Create New Room” from the bottom of the list and give your room a custom name. For my speaker, I’m asked to name the accessory. This name is how the device will be identified in the Home app. I’m going to keep it as is and continue. Now your accessory has been added to your home. You can add more accessories in the future by repeating these steps.
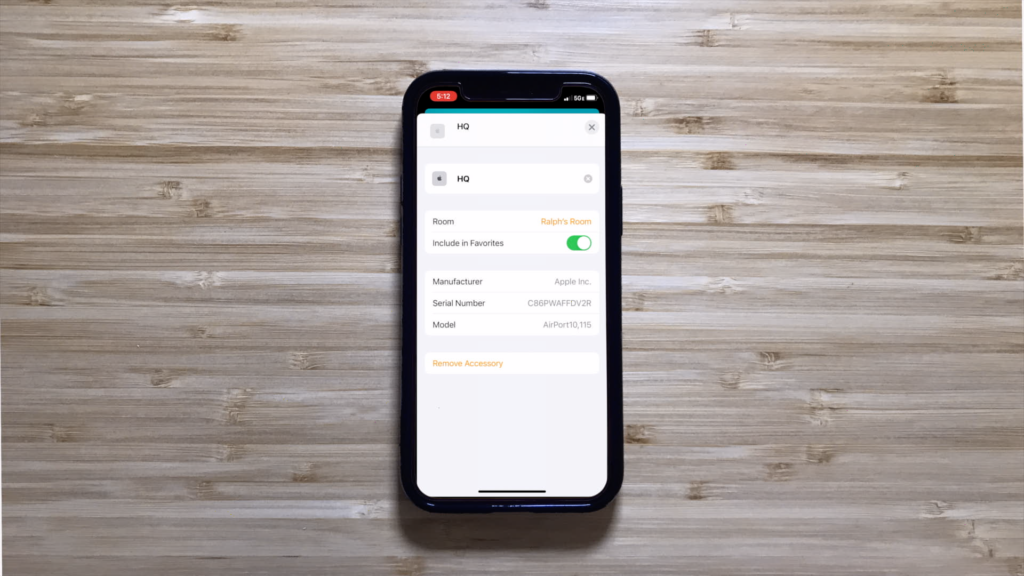
With the accessory added, let’s take a look at how to edit its setting. Click on the home button then, select “Edit Screen.” Notice how the accessories start wiggling, showing you’re in edit mode. Now select the accessory whose settings you want to manage. You can change its name, assign it to a different room, and manage other device-specific settings. When finished, click the x to close the popup.
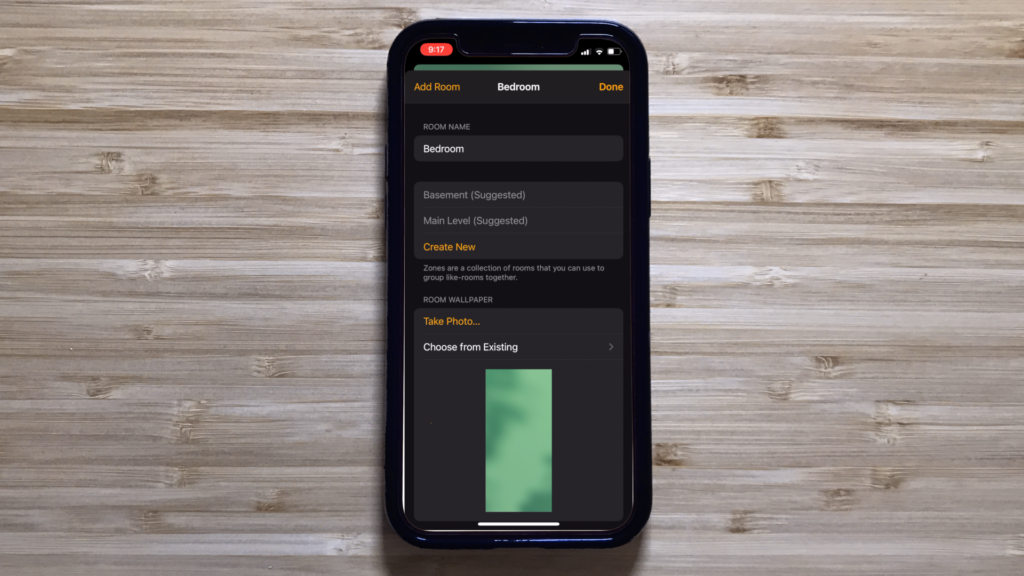
With your one accessory added, you can start configuring your rooms. If you click on the home icon again, you will see “Room Settings”, an option that was previously missing. From the “Room Settings” popup, you can edit the name, create zones, and change the wallpaper. To create a second room, tap “Add Room” give it a name, customize the wallpaper and click Save. Once you have multiple rooms in your house, the Rooms menu will replace the “Add Room” button. From this list, you can rearrange the order the rooms appear and create new ones.
Now let’s click “Done” and preview our home, rooms, and accessories. You can tap on the Home tab to see all of your smart accessories or tap on the Rooms tab to see your accessories split off into rooms. From there, you can swipe left and right to switch between your room.
With this, your HomeKit home is ready to do your bidding. You can now use Siri to control your accessories or manually control them from the Home app. For quicker access, you can control your most-used devices from Control Center. However, you may need to enable “Show Home Controls” in iOS settings. By enabling Home in your iCloud settings, your accessories will sync between all of your devices. And, if you want to share control of your accessories, you can invite members by going to “Home Settings” in the Home app.
As you can see, the Home app is a great way to conveniently access and control your smart accessories through your Apple ecosystem, along with the added benefit of Apple’s top-notch privacy policy. Unfortunately, many smart devices don’t natively support HomeKit. But hope isn’t lost yet. Stay tuned for next week’s video, where I will show you how to turn any generic smart tech device into a HomeKit device.
Links:
Previous Posts:
HomeKit Resources:
- Apple.com: Home
- Apple.com: Home Accessories
- Apple.com: Shop HomeKit Accessories
- Apple Developer: HomeKit
HomeKit in the News:
- Apple Insider: HomeKit Guide
- 9to5Mac: HomeKit Guide
- Cnet: Best HomeKit devices for 2021
- Tom’s Guide: The Best HomeKIt devices in 2021
Subscribe: Apple Podcasts | Google Podcasts | Spotify | Amazon Music | Android | Pandora | Blubrry | Email | TuneIn | RSS | More