
Think of all the important files on your Mac. Your massive photo collections of your children growing up, that vacation you took a couple of years ago, or that party you went to in your younger days. How about your important documents from work or school. Now think what would happen if all of that disappeared in an instant. Maybe you lose your MacBook, or it’s stolen. Maybe something inside your computer fails, like your storage drive. Or, one day, you turn on your computer, and nothing happens. In an instant, all those memories are gone, and all that hard work has vanished. This is why it’s so important to back up your computer, and that’s what I’m going to show you today.
When you’re backing up your computer, you’re making another copy of your treasured information. It can be a full copy of your computer or just important folders and files. Then, if something happens to your computer, you have another copy of your data to fall back on.
Now, there are a couple of places you can save another copy of your data, a local backup with an external drive, and/or an off-site backup with a cloud provider.
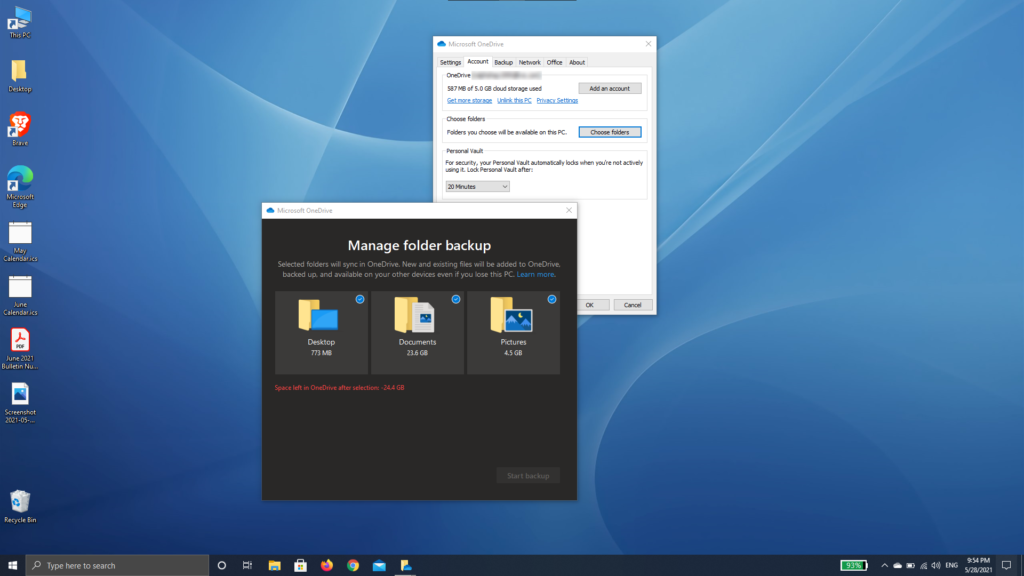
First, let’s look at the cloud, which may be a more expensive option since it requires a subscription plan from a cloud service like Google Drive, iCloud Drive, DropBox, or Microsoft OneDrive. The way this works, each of these cloud storage solutions has a desktop app. From their app, you can dictate which folders on your computer you want to sync. Anytime you save a file, delete a file, or edit a file in one of those folders, your changes are, more or less, immediately copied to that cloud service, as long as you have an internet connection and are signed in.
In addition, each of these cloud storage providers has an app for Mac and Windows, Android and iOS, and web access. With this, you can access your files saved on the cloud from any device.
The cloud is a good solution if you switch between multiple devices, like a desktop, laptop, and phone. For instance, you use your iMac at home and a MacBook when you’re on the go. You can start a document on your laptop and save it to the cloud. Then, once you get home, you can open that file on your iMac and pick up where you left off. It does all of this while also serving as an off-site backup.
So, which service should you use? Well, if you’re in the Google ecosystem, then purchase some Google Drive storage. If you’re in the Apple ecosystem, get some iCloud Drive storage. And, if you’re in the Microsoft ecosystem, get OneDrive storage. But, don’t be too quick to jump on OneDrive because you may already be paying for it. If you have a Microsoft 365 Family or Personal subscription, 1TB of OneDrive cloud storage is included with your plan, in addition to the most up-to-date version of Office. But, it also depends on which provider you feel more comfortable with and you think will keep your data private and secure.
If you want to learn more about these cloud solutions, check out the links below.
Cloud services are good for saving your important folders and files then syncing them across your devices. But, it still doesn’t capture a full copy of your computer. For that, we will need an external drive and a time machine.
Let’s start by looking into external drives. You can get these from almost anywhere, Target, Walmart, Best Buy, and, of course, Amazon. When browsing your options, there are two things to consider, its capacity and how it connects to your computer.
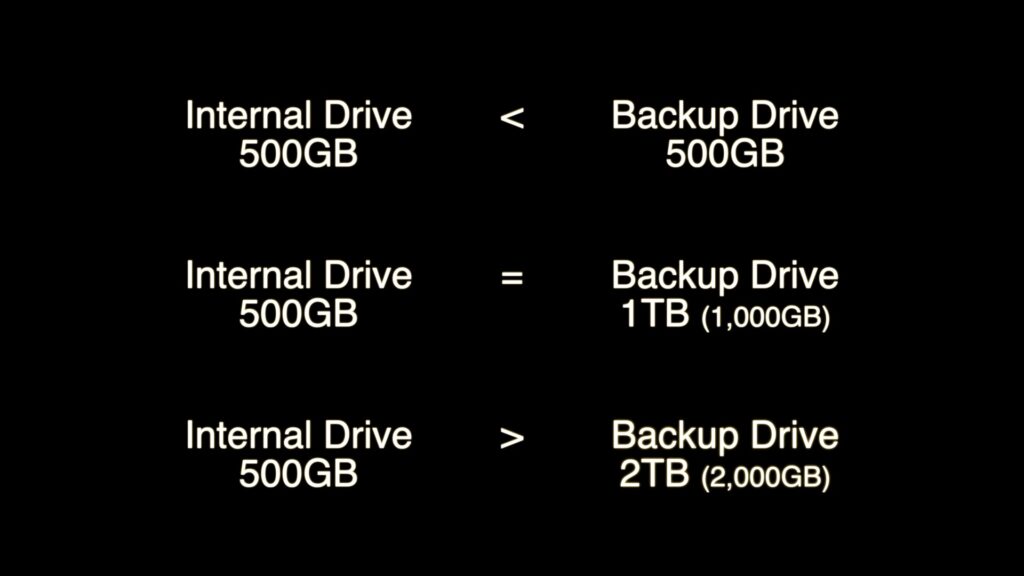
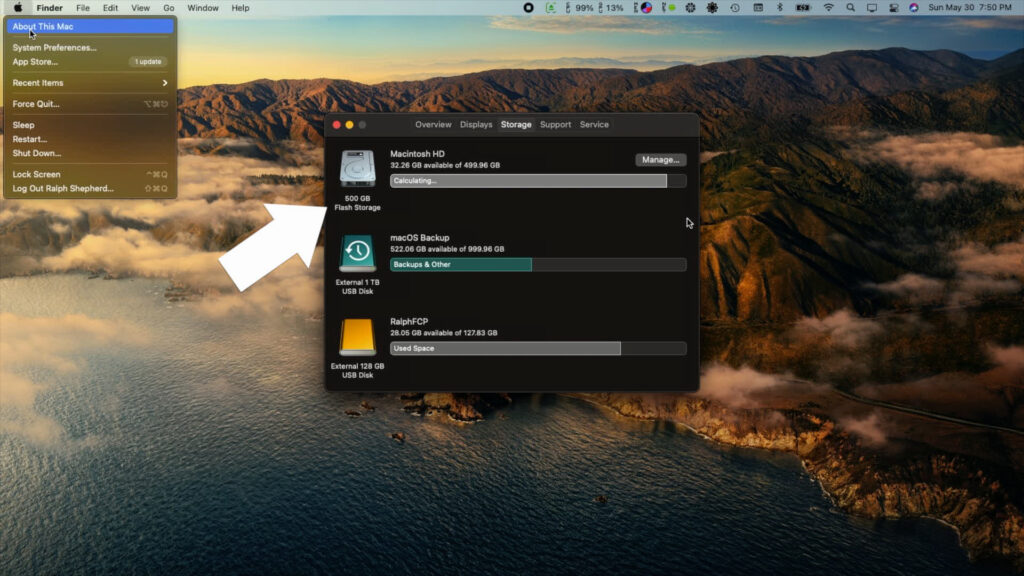
My recommendation is to find a drive that is twice the capacity of your computer. If you don’t know how much space is in your computer, click the Apple menu in the top left and select “About This Mac,” it should be the first option in the menu. In the About This Mac window, click the “Storage” tab, and your Mac’s internal drive should be the first one listed. Under the icon is your drive’s capacity. In my case, it’s 500GB. So, I would look for a 1TB external drive. If your drive is less than 500GB, get a 500GB external drive. If your internal drive is more than 500GB, then get a 2TB external drive.
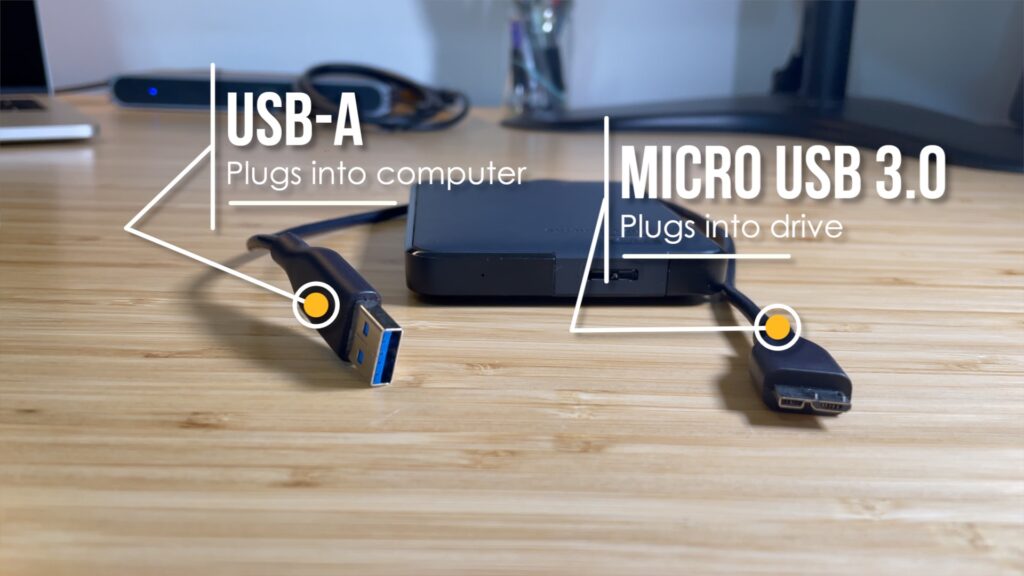
The next thing to look for is how the drive will connect to your computer. Right now, most external drives come with a Micro USB 3 to USB-A. The micro USB goes into the drive, and the USB-A goes into your computer. That’s the rectangular USB connector we have been using for years. However, if you’re looking for an external drive for your newer Mac, chances are you need a USB-C connector, and there are three ways to get there. Option one, just find an external drive that comes with a USB-C cable in the box. Option two, buy an additional Micro USB 3 to USB-C cable to replace the one that comes in the box. Option three, get a USB-A to USB-C adapter. Either one of these options should get you connected correctly.
Now that you have an external drive, it’s time to plug it into your Mac and configure the backup settings. So, open System Preferences and select Time Machine, Apple’s built-in backup software. With your newly acquired external drive plugged into your Mac, click “Select Backup Disk” and choose your external drive from the list. Now, it’s time to wait as a full copy of your computer is copied to your, now, backup drive.
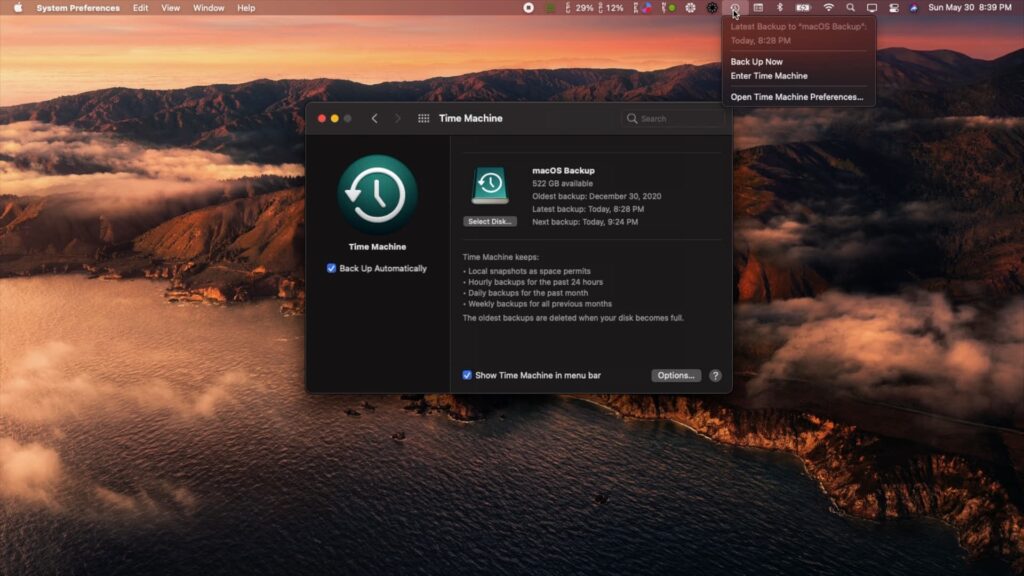
While you’re waiting for your backup to complete, you can enable “Back Up Automatically” and “Show Time Machine in menu bar.”
Now, let’s take a look at how Time Machine works. It all starts by creating a full copy of your machine. Then, instead of continuing to make full backups, a snapshot of your changes is made every hour. Those hours are condensed into days, days are condensed into weeks, and weeks are condensed into months. Then, when the drive starts to fill up, older snapshots are deleted.
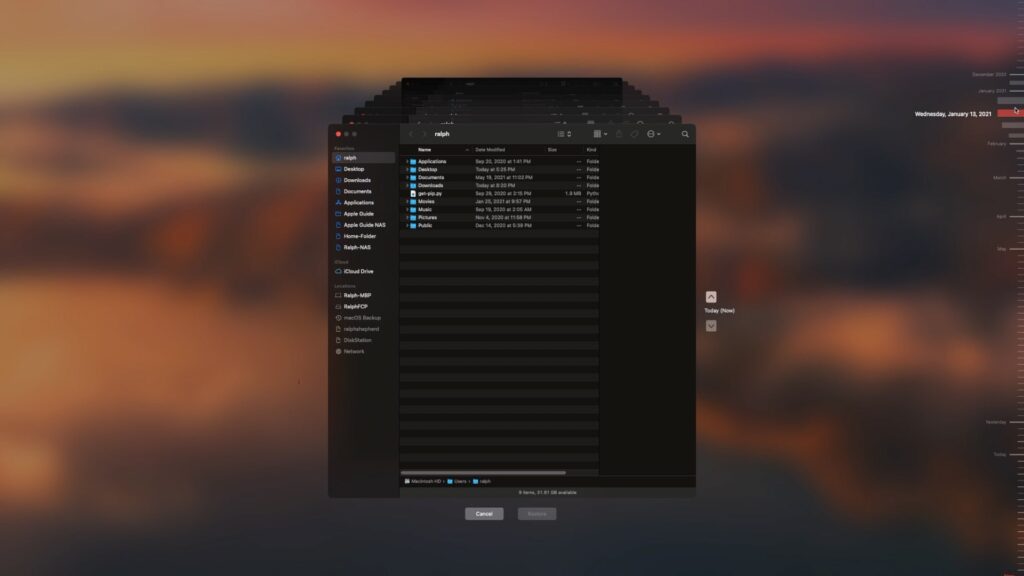
After your backup is complete, you can take a look at what it captured. Click on the Time Machine logo on the menu bar. From this menu, you can “Back Up Now,” but what I want to show you is how to enter the time machine. Here, you have a Finder window that you can use to navigate around your files. Then, using the timeline on the right side of the screen, you can jump between different snapshots or points in time.
So, let’s look at how to bring documents back from the dead. Let’s say you deleted a file yesterday, and now you need it. You can hop in the Time Machine, go back to yesterday, navigate to where that file was, select it, then choose to restore. Now that file has been brought back to life in the present day.
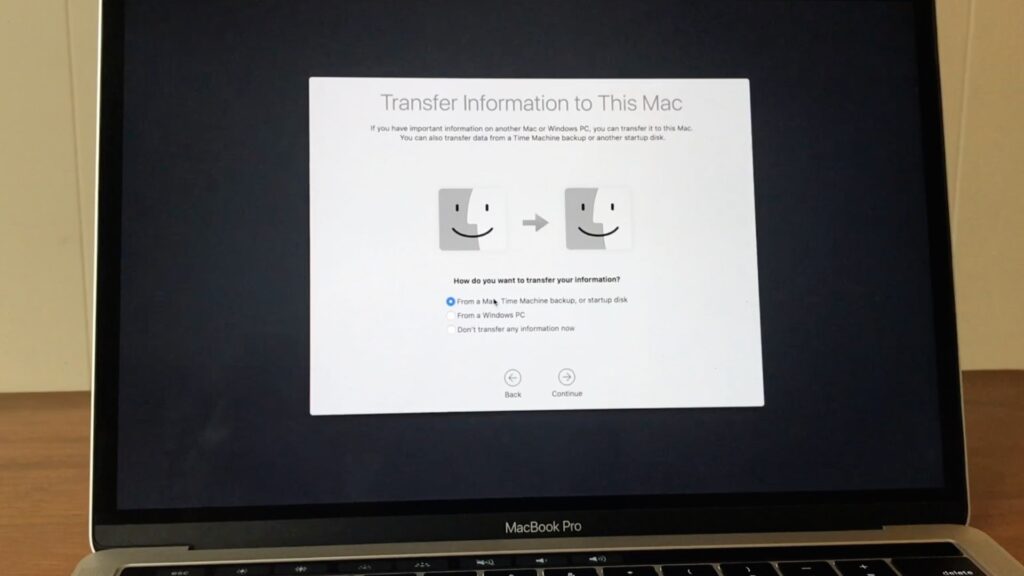
Let’s say your setting up a new computer, and you want to set it up exactly like the one it will be replacing. In this case, follow Apple’s traditional wizard until asked if you would like it set up as a new Mac or restored from backup. If you choose to restore from Time Machine backup, you can plug in your old external backup drive and watch as all of your files are copied to your new machine. Then, you will be up and running in no time.
Now, you have a local and off-site copy of your machine. In case something happens to your computer, you can fall back on your local backup. Or, if something happens to your computer and backup drive, you can fall back on your cloud backup, which is also syncing your files between your devices. And, from this point forward, make sure the backup solutions are running regularly.
A computer drive can fail at any time, and you could lose everything. So, be proactive and BACK UP YOUR DATA!
More Resources
Cloud Providers
Time Machine Apple Support:
- Back up your Mac with Time Machine
- Backup disks you can use with Time Machine
- Restore your Mac from a backup
- If a Time Machine backup takes longer than you expect
Example Backup Drives from Best Buy
- WD 1TB External Drive with USB-A to Micro USB 3 cable
- Seagate 1TB External Drive with USB-A to Micro USB 3 cable & USB-A to USB-C adapter
- G Drive 1TB External Drive with USB-C Cable
Subscribe: Apple Podcasts | Google Podcasts | Spotify | Amazon Music | Android | Pandora | Blubrry | Email | TuneIn | RSS | More