

Soon, Apple will be releasing macOS Big Sur (macOS 11), and with it comes the biggest facelift to macOS since the release of macOS 10 (Cheetah, MacOS X) in 2001. Love it or hate it, macOS will start borrowing the design language iOS, including iOS’ boxy icon style. However, icons are one of the few things in macOS you do have the power to customize.
In macOS, you can change the icon of any app, file, or folder to further personalize your computer. In short, it’s as easy as copying and pasting.
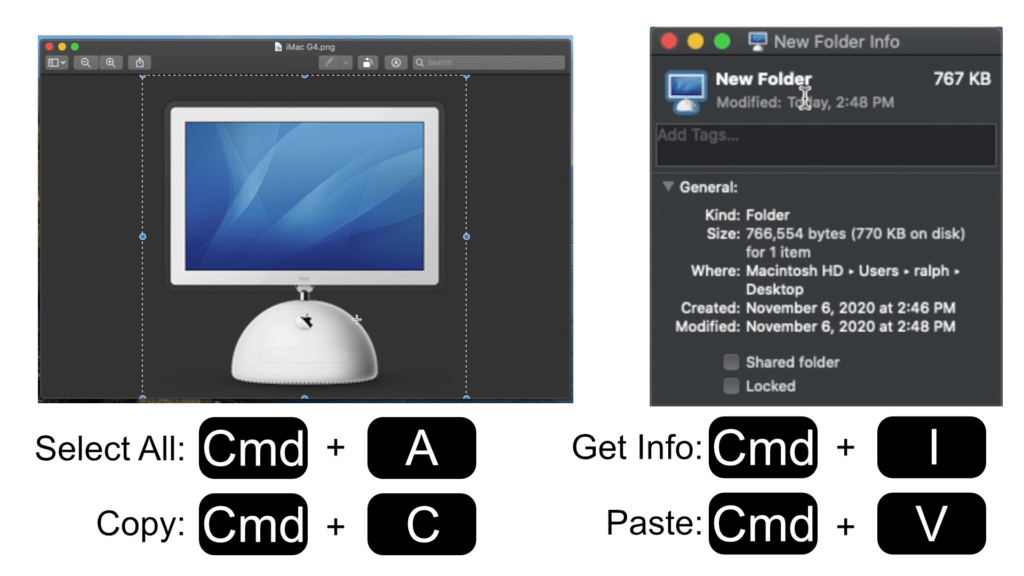
Start by finding the picture you want to use as the new icon and open it in Preview, macOS’s default photo viewer. Use the keyboard shortcut Cmd + A to select the picture and Cmd + C to copy the picture. Now navigate to the app, file, or folder that you want to change its icon and select it. On your keyboard type Cmd + I to open the Get Info window. Get Info will tell you all sorts of information about the selected file, but what we want to focus on is the icon. If you click the icon in the top left of the Get Info window you will see a blue outline appear around it. Now that the icon is selected, use the keyboard shortcut Cmd + V to paste the picture. And that’s how you change an icon on macOS.
If you don’t like how it turned out you may want to make some adjustments all of which you can do in Preview. One thing you can try is cropping the image to focus more on the subject. To crop, use the keyboard shortcut Cmd + A to select the image. Then use the blue dots around the image to select the parts you want to keep. Once you have made your selection use the keyboard shortcut Cmd + K to crop the image. Under the Tools tab, there are many other properties you can play such as color adjustments, size, and annotating. Play around with it and design your icon exactly how you want it. Then repeat the steps for changing your icon.
Since the early days of macOS 10, you have been able to customize your icons however you like, and now it’s time to get creative.
Free Icons:
Help:
- Apple Support: Create custom icons for files or folders on Mac
- 9to5mac: How to change Mac app icons
- Business Insider: How to change the icon for any program or file on your Mac, and remove it later if you need to
- HowToGeek: How to Change App, File, and Folder Icons on a Mac
- Lifewire: Personalize Your Mac by Changing Desktop Icons
Subscribe: Apple Podcasts | Google Podcasts | Spotify | Amazon Music | Android | Pandora | Blubrry | Email | TuneIn | RSS | More