
Backing up your Mac is important because you have only one internal drive and once it goes all of your data can be lost. At ant time you can say goodbye to all of those family photos or work documents. So be smart and backup your Mac.
Requirements
- Time Machine on a Mac running macOS 10.5 or higher
- An external drive: Click Here to read “Which Backup Drive is Right for Me?”
Setup
Step 1

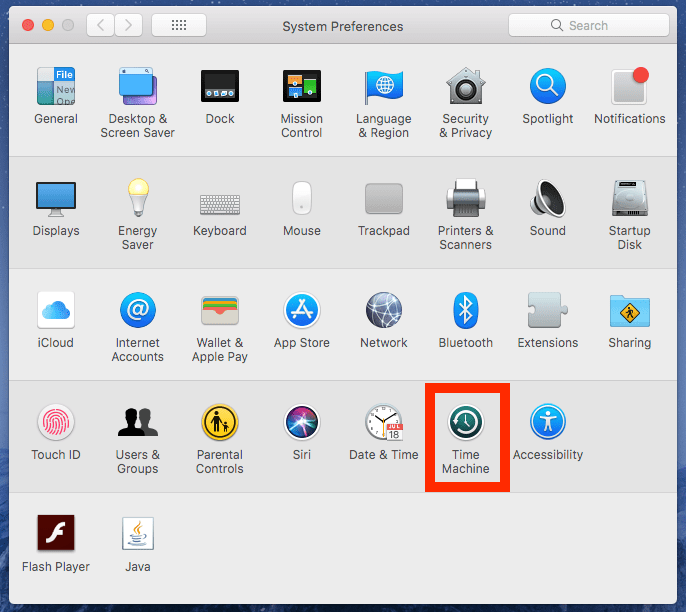
Open System Preferences by click on the Apple logo in the top left corner of the menu bar then go down to System Preferences
Step 2
Now that you’re are in System Preferences click on Time Machine
Step 3
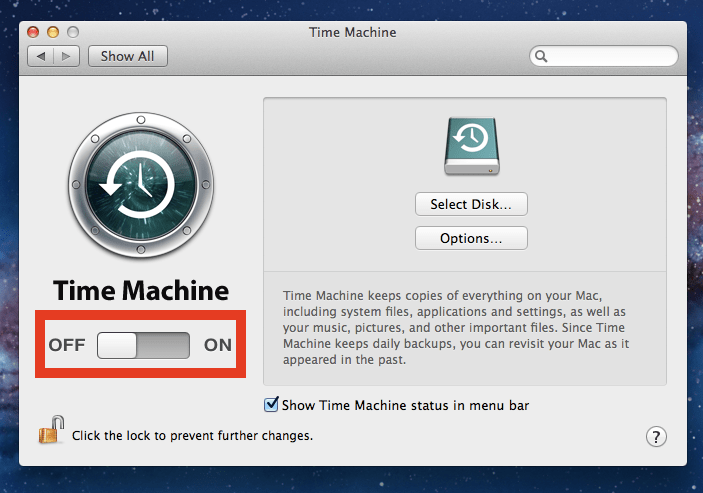
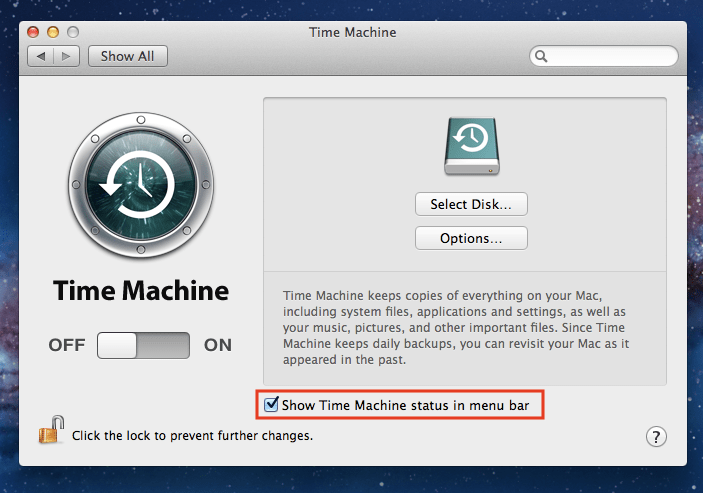
Once the Time Machine preference pane open toggle the On/Off switch
Step 4
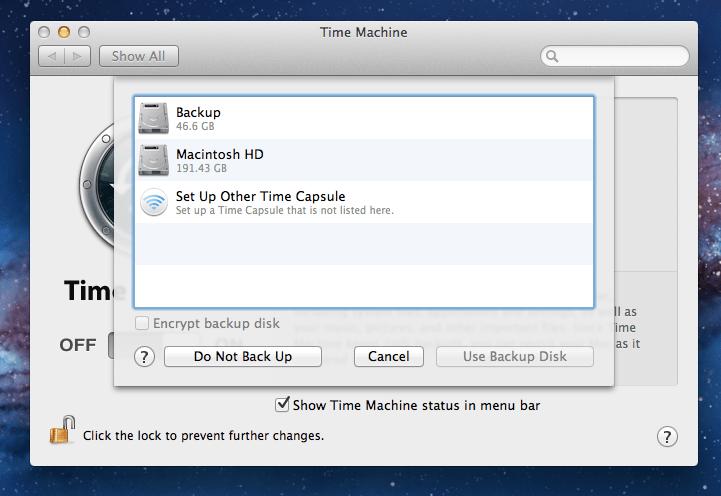
At this point, you will be prompted to connect your drive to your computer and select it from the list. If you need to before you select the drive for back up format or wipe it using Disk Utility in the Utility folder
Step 5
Now your computer should start backing up to your external hard drive.
What can I do With It?
Now that your data is saved on another drive you can retrieve your data when you need it. As the drive fills up it will begin to delete older backups to make room for all future backups. Don’t copy files over one by one because it can corrupt the backup. Instead, use the following methods to restore your data.
Migration Assistant
Migration Assistant is an application that is built into macOS. It allows you to retrieve full packages of data including whole folders and categories.
For example, when setting up a new or recently restored Mac in step 5 you are asked if you would like to transfer your data now, later, or never. If you choose “From a Mac, Time Machine backup, or startup disk” then Migration Assistant will start and you can follow the steps and copy your data over. If you choose later once you are done setting up your Mac you can go to MacintoshHD>Applications>Utilities>Migration Assistant and copy your data over that way.
Restore a File
Everyone has deleted a file at one point or another a regret it. Then there was no way to get it back and it was gone forever. Well not anymore. Now that you have your backup enabled you can go back and bring back the file from the past. To do this go back into Time Machine preferences. At the bottom of the preference, pane makes sure that “Show Time Machine in menu bar” is enabled with a checkmark in the box.
Now go to the menu bar at the very top of your screen and click on the Time Machine logo.
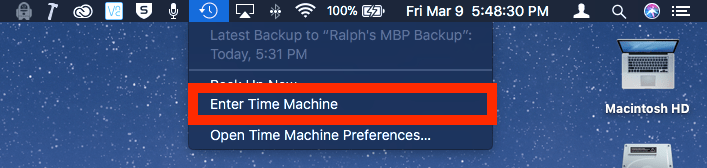
Then Click on “Enter Time Machine”. Then the past history of the folder will appear in the background. Navigate to where the deleted file was last seen and used using the timeline on the right. Once found your missing file select it and click Restore. That file will now appear back in the present time version of that folder. Then click escape (Esc) on the keyboard or cancel under the finder window to return to your desktop.
This doesn’t only work with Finder. It can also find past versions of Keynote presentations, Pages documents, and Numbers documents, emails in the mail, and more.
Second Boot Option
If something happens to your main internal boot drive you can startup your backup by shutting down your computer. Then start it up again holding the “Option” key on your connected keyboard. You will then get a list of boot options. Choose “EFI Boot” from the list. Now your computer will boot using your external backup.
You may have some speed problems using this method though because most older USB cables cannot carry enough data to provide a smooth experience.
Helpful Links:
Apple Support: How to use Time Machine to back up or restore your Mac