

Photos are the default app for importing photos and videos into a library stored on your Mac. But there is another app in your “Applications” folder of your Mac that most people overlook called Image Capture. Unlike Photos, Image Capture imports your photos and videos to the folder of your choice. This is a great option to use if your importing pictures to share or if you’re a Windows user because Photos libraries cannot be opened in Windows.
How it Works
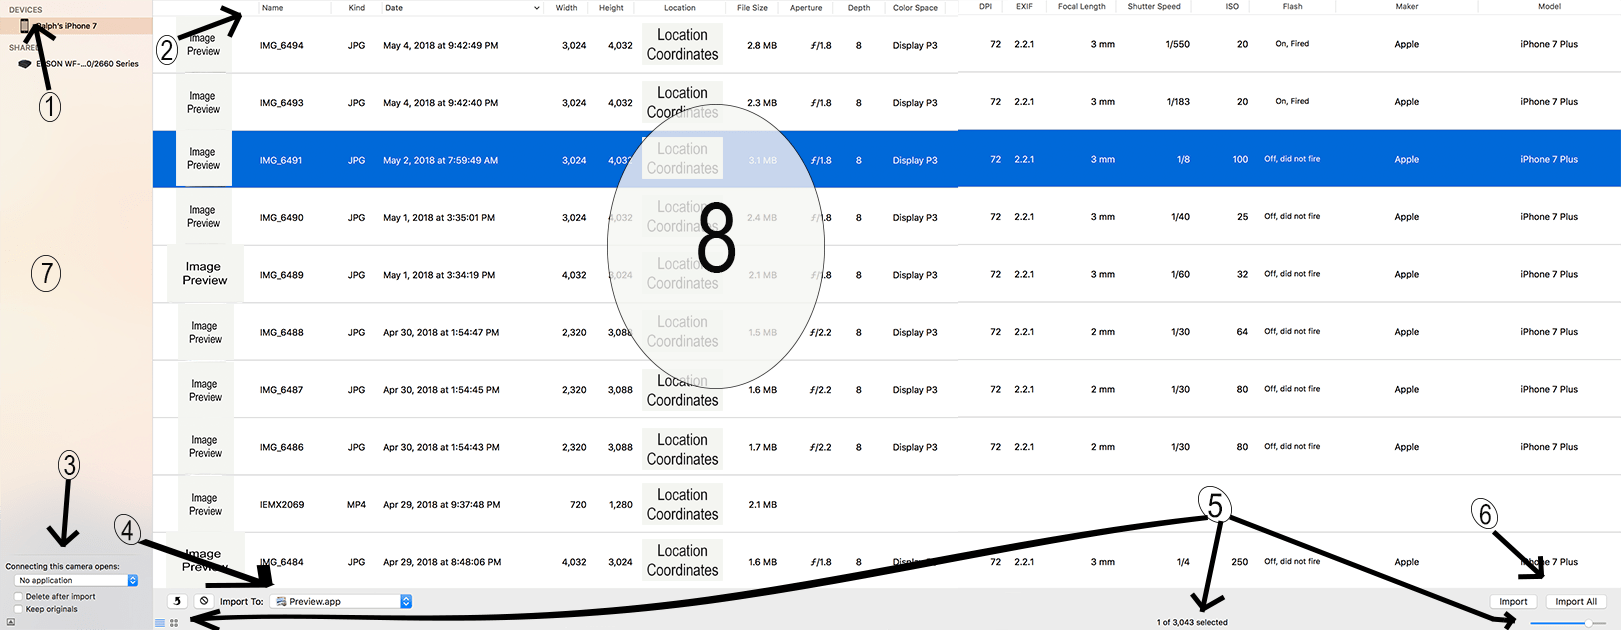
First, you will need to plug in your camera, smartphone, tablet, SD card, or any other photo or video storage device into your Mac. ①When you open Image Capture your photo storage device will be listed on the left menu under “Devices”. You will also notice that there is a “Shared” group in that same menu, this is where you will find shared storage options like network scanners which I will talk about later.
Key:
- Devices: list of connected camera devices
- Category headers used for sorting
- Camera and computer relations options
- Choosing where to import and deleting
- View Options
- Import Options
- Sidebar
- List of pictures
⑧Once you select your device all of your pictures will be displayed to the right. You can scroll through the list to see all of your photos. At the top are your column headings which you can use to sort your images by clicking on a category.
At the bottom are all of your import options. ④By clicking the “Import To:” menu you can choose where to import your pictures. Some default options include Photos, Mail, and recently used folders. If you don’t find your preferred destination click “More” at the bottom of the list. Doing so will open a file browser for you to use to find a place to save your photos. To the left is a delete button for you to be able to delete photos from your computer. ⑥All the way to the right is your import options including “Import” and “Import All”. “Import” will import only pictures that you have selected. To select more than one picture in a row select one photo, then while holding the shift button select the last photo of your choice. To select individual pictures to hold down the “command” key while selecting photos.
⑤Under the line of import commands are your view options. To the left are two view options icon or list. Icon view is great if you’re looking for a particular photo or photos, the List view is better if you’re browsing the metadata, which is information about the photo. In the middle is the number of photos selected out of the number of photos in all. Then on the right are the zoom option. Move the slide to the left to decrease the size of the listing photos or to the right to enlarge the photos.
③Referring back to the sidebar at the bottom are device options, like “Connecting this camera opens:” which will tell the computer what app to open when a device is connected. The default option is usually Photos but you can change it to Image Capture or you can locate another photo importing app like Adobe Lightroom. Then under that option are checkbox for if you would like to “Delete after import” or “Keep originals”. If you “Delete after import” the imported photos will be removed from the storage device.