
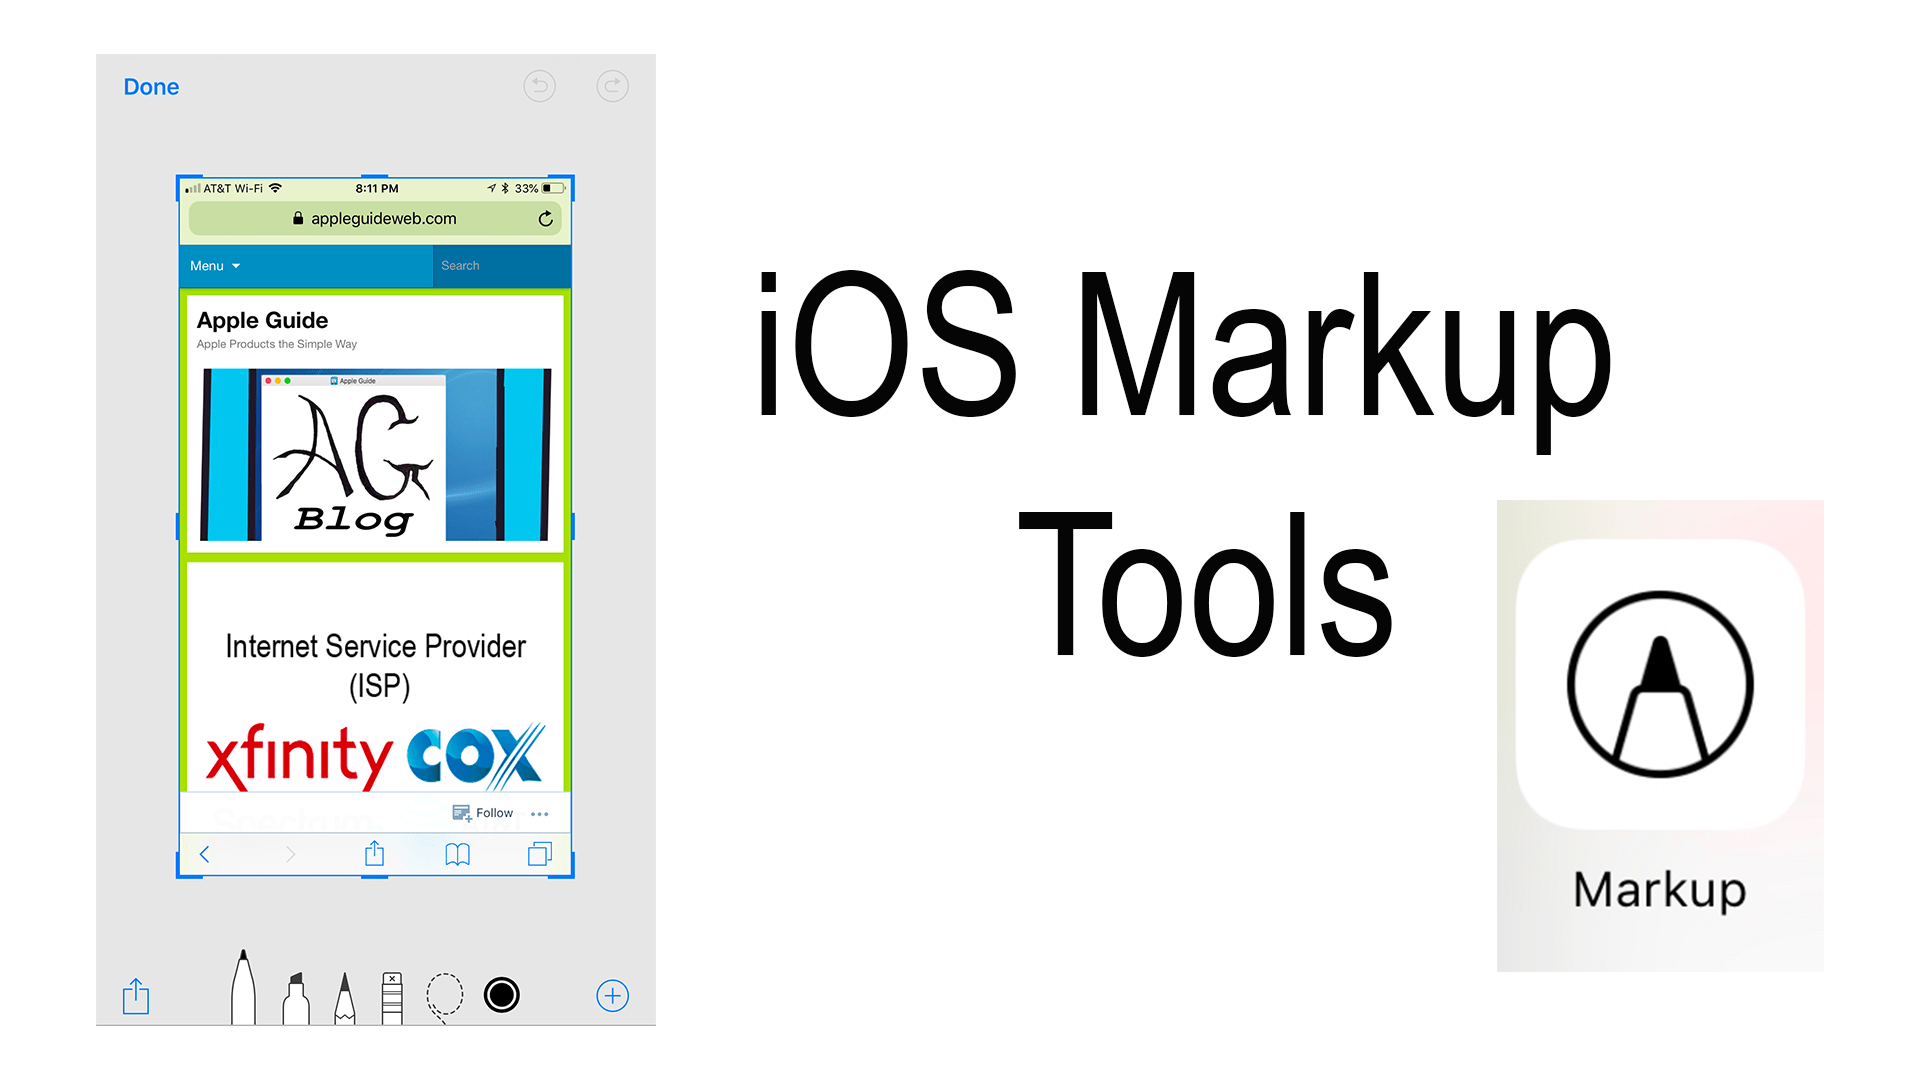

Markup tools was a feature added in iOS 10 that allowed users to use basic editing tools for images. They started out being very limited but have now expanded to many other places around your iOS device. The places it can get use the most are in photos when taking screenshots and saving PDFs in Safari.
Draw Tools
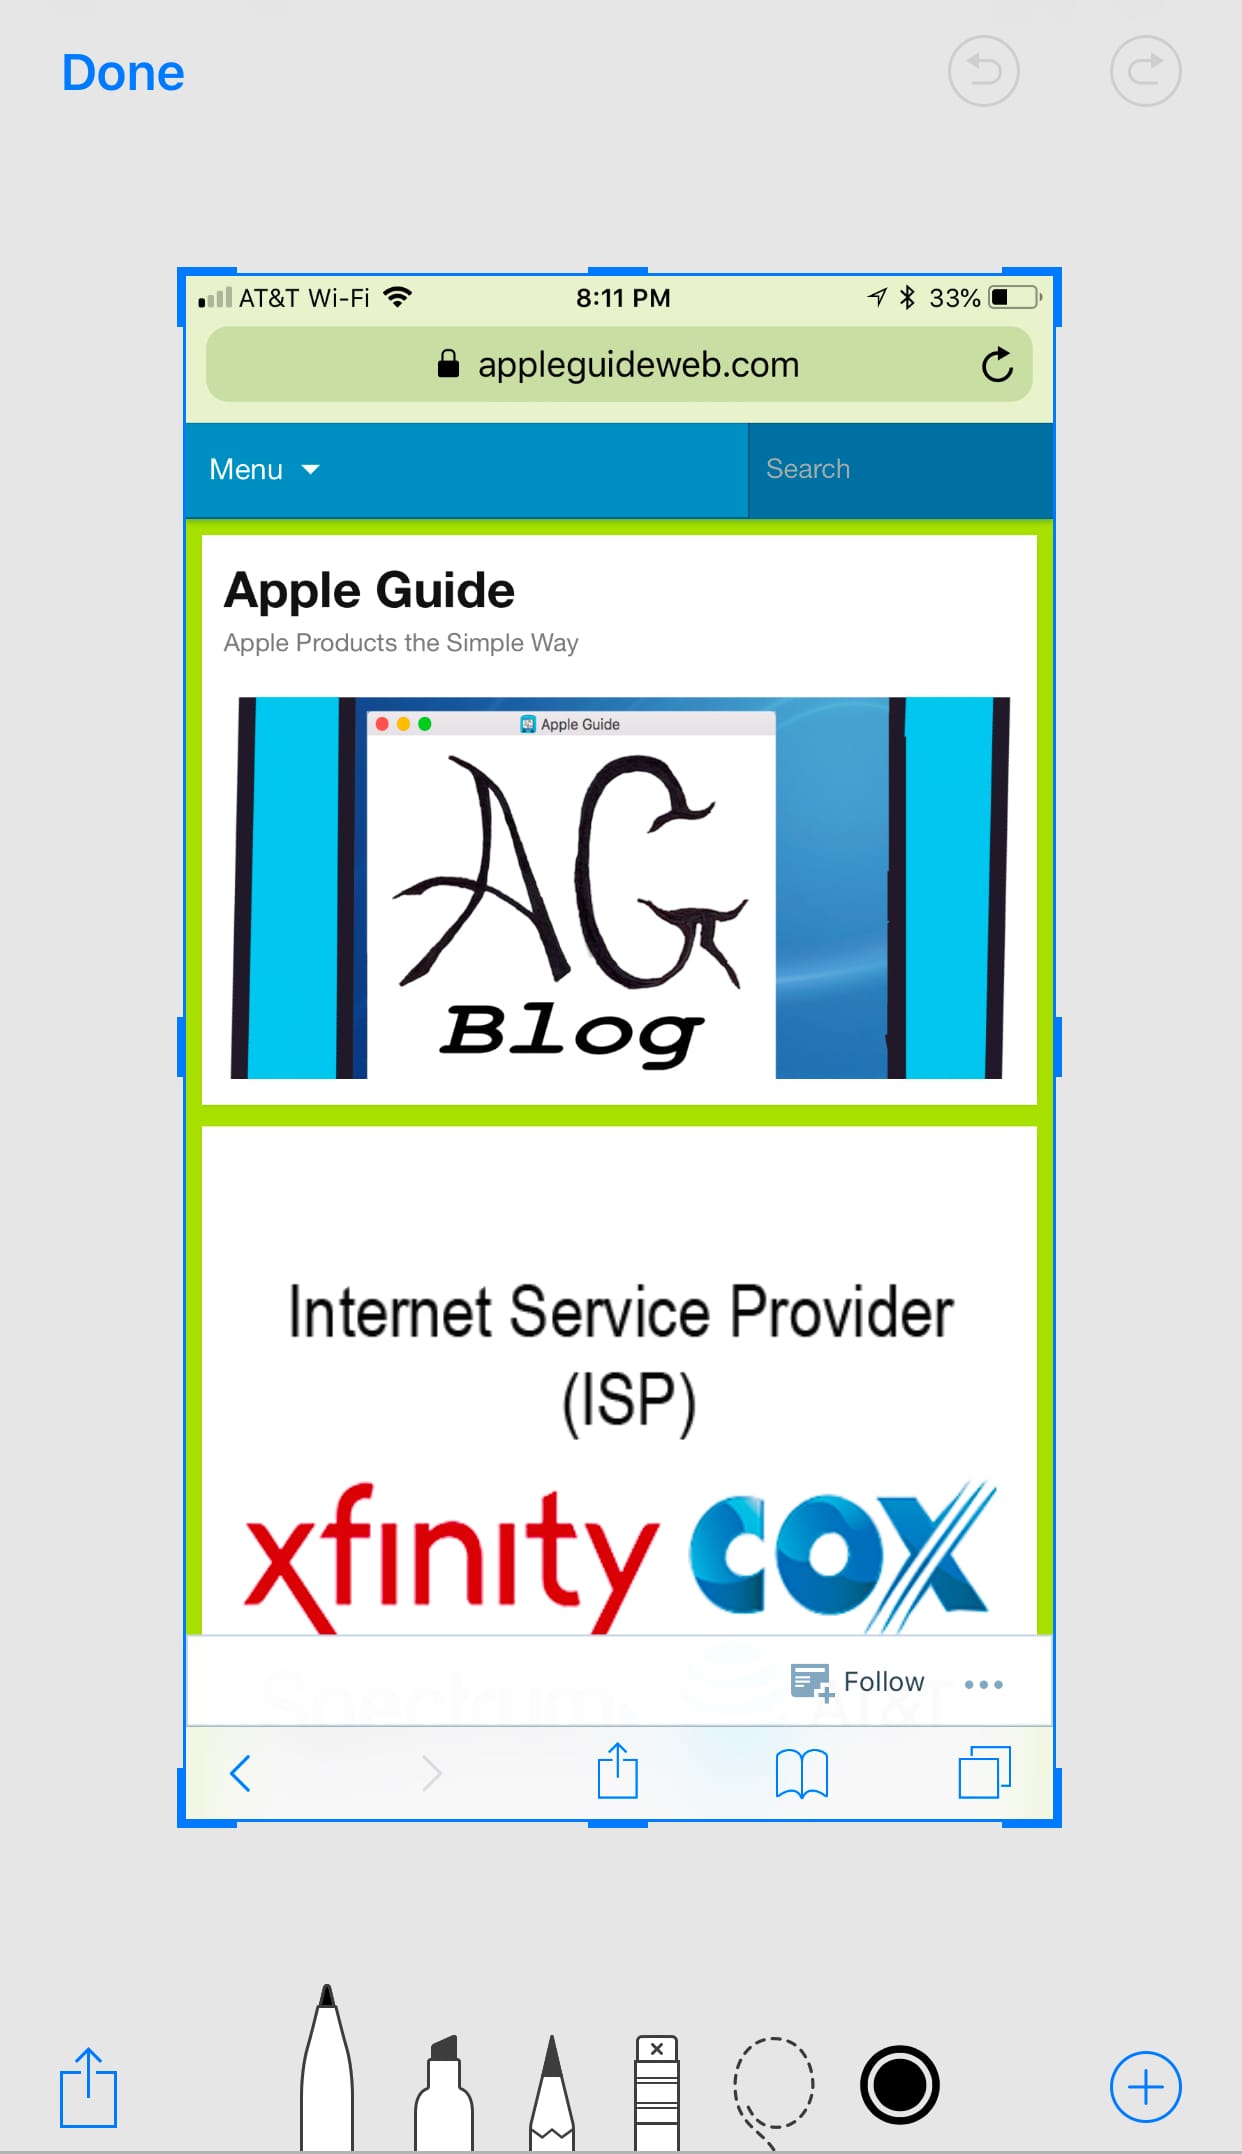
Either way, you make it there at the bottom are where you find your tools. Starting from the left there is the fine tip marker, highlighter, pencil in which you can use to draw all over your picture and highlight text. You can erase all of your marks by using the fourth option over which looks like a pencil eraser. Drag the tool over any of your scribbles to remove them. The circle color which is the sixth tool over changes the color of your drawing tool.
Lasso Your Work
The lasso looking tool allows you so circle doodles that you have added into your image in order to select them and move them around.
The Plus Menu
Jumping to the last command or the circled plus sign (+) brings more options that are not already on the main toolbar. These options include a test box, signature, magnifier, and at the bottom of the list shapes.
Text Box
To work with the text box click on it in the menu and it will be placed into the middle of the document. Tap once on the text box to select it or to make changes. When you tap a shortcut menu will appear with the options “Delete” the text box, “Edit” the text in the text box, or “Duplicate” to make another copy of it. To move the text box around click on the center and dragging it to its new location, also use the two blue dots to adjust the size.
While still selected at the bottom are text color options by clicking on the color dot. For text style options click the “aA” change the font style from one of the three options, use the slider to change the font size, and text arrangement left, center (default), justified, or left.
Signature
To add a signature click the option from the list then choose your signature from the list. If you need to “Add or Remove Signature” do so by clicking that option from the list. Once you have inserted your signature to your document you can move it around by clicking on the center and dragging it to its location and change the size of the text box using the blue dotted corners.
The third option down in the list is “Magnifier”. This adds a magnifying glass to your document creating a sort of zoom on a subject. Just like with signatures and text box you click the center to drag it around and use the blue dot to increase the size. The green dot that is located somewhere around the circle increases the magnification. At the bottom, toolbar is color options for the outline and three width options.
Shapes
The four shapes are the last option in the menu. Your option is a square, circle, speech bubble, and arrow. Once again just like a text box uses the blue dots surrounding the shape to resize it. The toolbar options are just the same a the magnifier tool, you have your color outline option and a fill or widths options.
Helpful Links: