

So we are back on macOS this time to look at taking screenshots and screen recordings. Doing each of these is super useful and easy. So let’s dive in.
Let’s start off with the basics, if you want to capture your whole screen then use the keyboard shortcut Cmd+Shift+3.
Or you can choose what to capture using the keyboard shortcut Cmd+Shift+4. You will then see your screen freeze, except for any videos playing, and your mouse turns into a crosshair. Now use your mouse to make the selection by clicking and dragging over what you want to screenshot. Notice the part of the screen you select is darkened. When you let go of your mouse, that part of your screen will be captured.
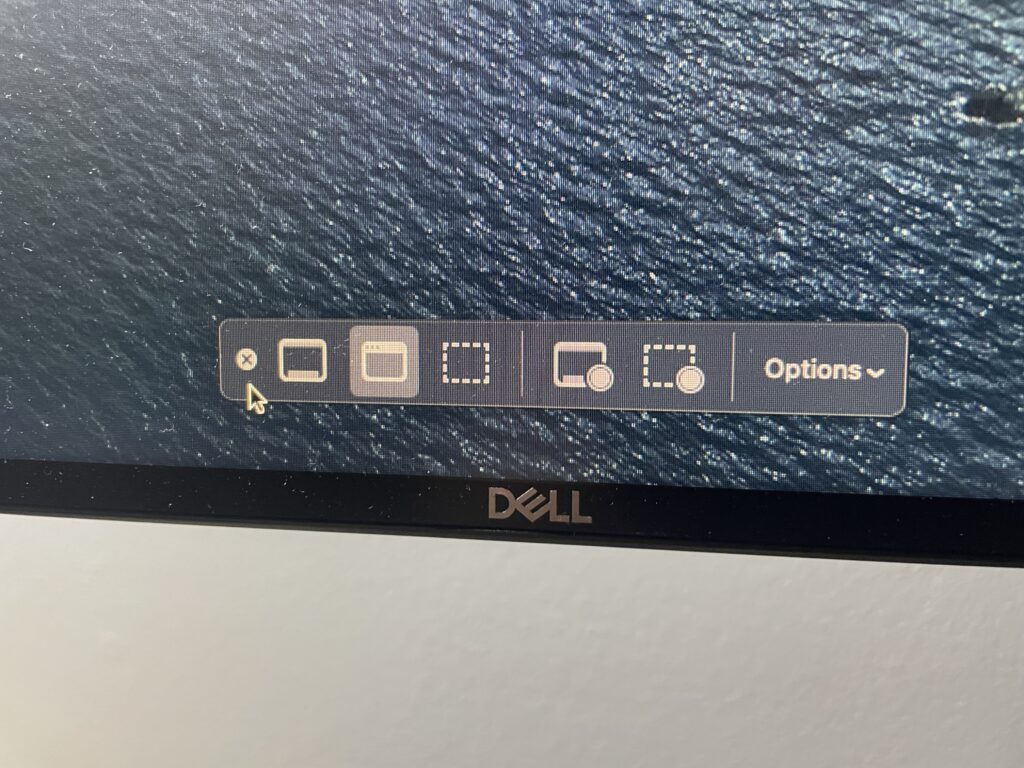
Lastly, use the keyboard shortcut Cmd+Shift+5 to open the Screenshot app which will give you more advanced options. At the bottom of the screen, a toolbar will appear with your different screenshot options. Hovering over each option will tell you what that tool does.
“Capture entire screen” will let you choose which screen you want to capture. “Capture Selected Window” will let you choose which window to capture. Lastly, “Capture Selected Portion” will let you free draw what you want to capture.
Moving on to screen recording. “Record Entire Screen” will let you choose which screen you would like to record. Or you can “Capture Selected Portion” which will only record your selected part of the screen. To stop a recording click the stop recording button on the menu bar. If you have a MacBook with a TouchBar you can control your recording from there.

Lastly, you have the options menu where you can change the default location screenshots and recordings are saved. You can set a timer that will delay the start of your screenshot or recording by either 5 or 10 seconds. If you plan on recording your voice along with your screen you can choose your recording device. Then you have three options, whether to show the thumbnail after your shot, if you want to remember your last screen selection, and if you want to show mouse clicks while recording.
When you’re finished taking a screenshot or screen recording a thumbnail of the shot will appear in the bottom right of the screen. Clicking on the thumbnail will open a snapshot of the image or video that you can annotate and/or share. If you just want to save your screenshot drag it to the right of the screen to dismiss it. It will then save your shot in the default location which is your desktop. Alternatively, you can drag the thumbnail anywhere else you would like it to be saved.
So that’s the simple and more advanced way of taking screenshots and screen recordings on macOS. You never know when you may need to use these useful features but here they are.
If you need more help you can follow this Apple Support guide on how to take a screenshot: