
Every year the iPhone camera gets a little better. This year’s iPhone 12 is no different. Every year the iPad gets a little faster. The release of the iPad Air 4th Gen is no different. So I put both of these devices to the test. Here’s the result.
But first, a quick vocab lesson:
FPS or Frames per second is the number of pictures taken each second. If you’re shooing in 30fps, then 30 images are captured every second. The higher the FPS, the smoother the video will be. For reference, 24 FPS is the standard for movies.
High Dynamic Range or HDR is how bright a screen or video can be versus how dark the screen or video can be. HDR on its own holds no meaning, all it says is there is a high contrast between the light and dark parts in a scene.
Dolby Vision is an HDR standard that gives HDR meaning. For a video or screen to be in Dolby Vision, it must follow Dolby’s rules that say the video or screen must get this light and this dark and can show these colors.
4K is the video resolution. In a 4K video, there are 4 thousand pixels captured per image. The resolution is one of the pieces of the puzzle that make a clear image.
Those were some quick definitions. If you want to learn more about these subjects, check out the links below.
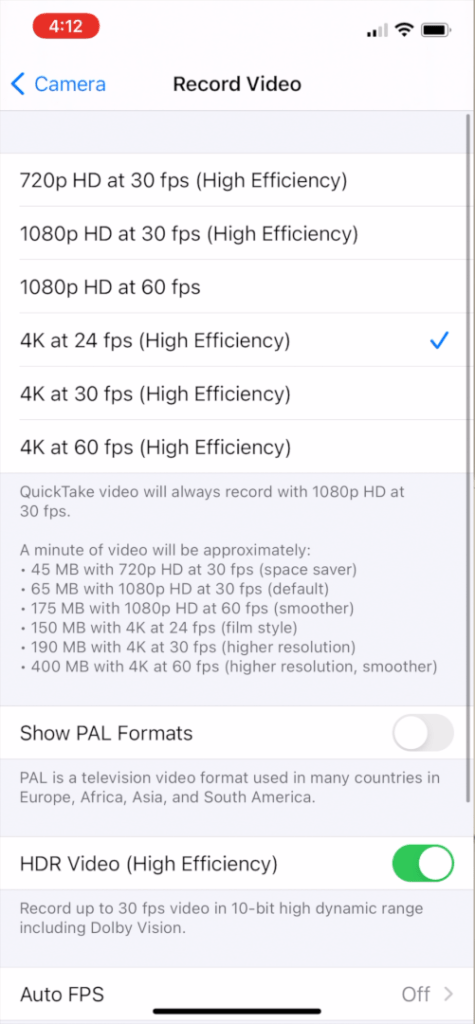
For this video, my goal was to shoot in 4K, HDR (Dolby Vision). HDR video being the headline addition of the iPhone 12. Unfortunately, I set the camera settings on 4K, 60fps, HDR. Why is this unfortunate you may ask? Well, the standard iPhone 12 only supports 4K, HDR at 30fps. If you want to record at 4K, HDR at 60 fps, you’re going to need an iPhone 12 Pro. I didn’t realize my mistake until editing. I was shooting in 60 FPS to give myself more flexibility while editing because I would have more frames or images to work with. In the end, I didn’t need the 60 FPS while editing, and I exported the video in 30 FPS. It was just an unfortunate mistake.
Even though I missed out on the highlight feature of my new iPhone, it didn’t impair the quality. The captured videos are all stunning and really show how far Apple has come with computational videography. Apple undoubtedly has one of the best smartphone video cameras on the market.
My second goal was to put my new iPad Air 4 to the test, and that I did. Since this was a test, I went with iMovie, Apple’s free consumer-grade video editing application. Alternatively, I could have used LumaFusion, but it cost $30. I used to use the desktop version of iMovie to edit these videos, but eventually, I grew out of it and upgraded to Apple’s pro video editor Final Cut Pro. Since Apple doesn’t make Final Cut for iOS, LumaFusion is the next best thing, more on that later.
In my opinion, iMovie on iOS is trash. It’s way oversimplified and feels like it hasn’t had a real update in years. The iPads we have today are perfectly capable of performing higher-end edits.
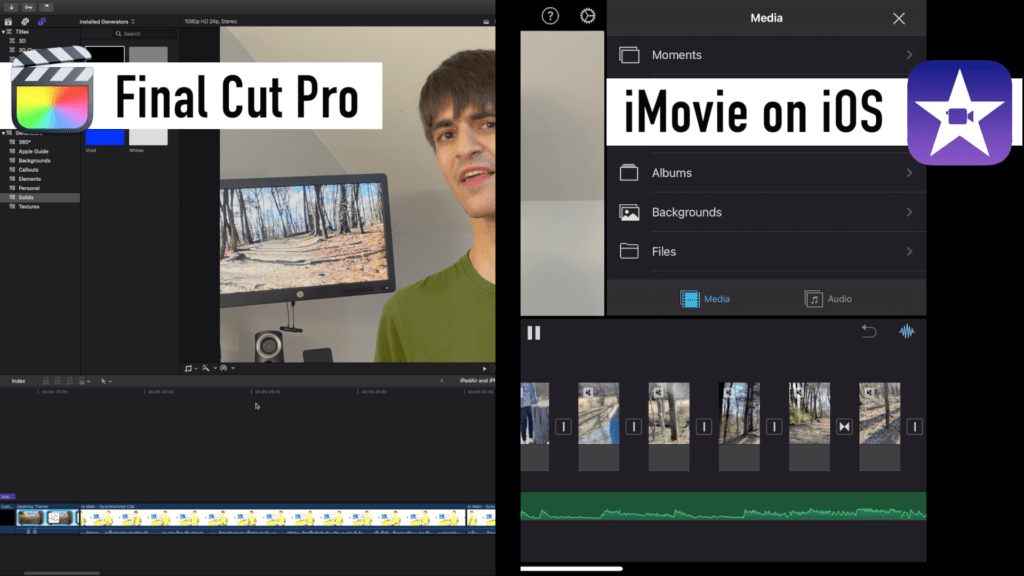
To make the music video style, I was aligning clips with portions of the soundtrack. However, this was easier said than done. My main issue with iMovie is what I call the relative timeline. In higher-end video editors, the video clips snuggle up next to each other. In iMovie on iOS, you get this giant gap between each clip to tell you the transition style. Meanwhile, the audio track keeps going right through the break. It’s a little hard to explain, more something you have to try for yourself. That being said, iMovie is clearly for throwing some clips together and exporting them together as one video. For most people, that’s all they’re looking for.
Ignoring my struggles with iMovie, this experience taught me two things about my iPad Air.
1) The screen size is not too small for video editing, and when used wisely, can easily provide everything you need right at your fingertips.
2) The iPad Air is easily capable of editing high-quality videos, no questions asked. Media can instantly be dropped in the timeline, with playback being buttery smooth. There were a couple of times things started to lag when playing over cross-dissolve transitions, but nothing that was the end of the world.
In the end, I was able to relearn iMovie, edit, and export the video in about 2 hours. How does all this compare to my maxed out 2017 13” MacBook Pro? Well, this was easy to find out. Apple’s Pro video editing software, Final Cut Pro, can open iOS iMovie projects. So, I AirDropped the whole project to my MacBook. This includes all the video clips, their position on the timeline, everything. It took an undisturbed hour with my little laptop giving it everything it has for Final Cut to import, open, and analyze the iMovie Project. An hour!
While editing this video, I tried importing the iMovie project into Final Cut again, but it only took about two minutes for the project to import. I have two guesses for why this is. One, somewhere on my computer Final Cut has a cache of the video files. Also, the very first time I imported the project, there were many things open in the background. This time I had everything closed and had recently restarted my computer. But that doesn’t mean my MacBook is in the clear yet.
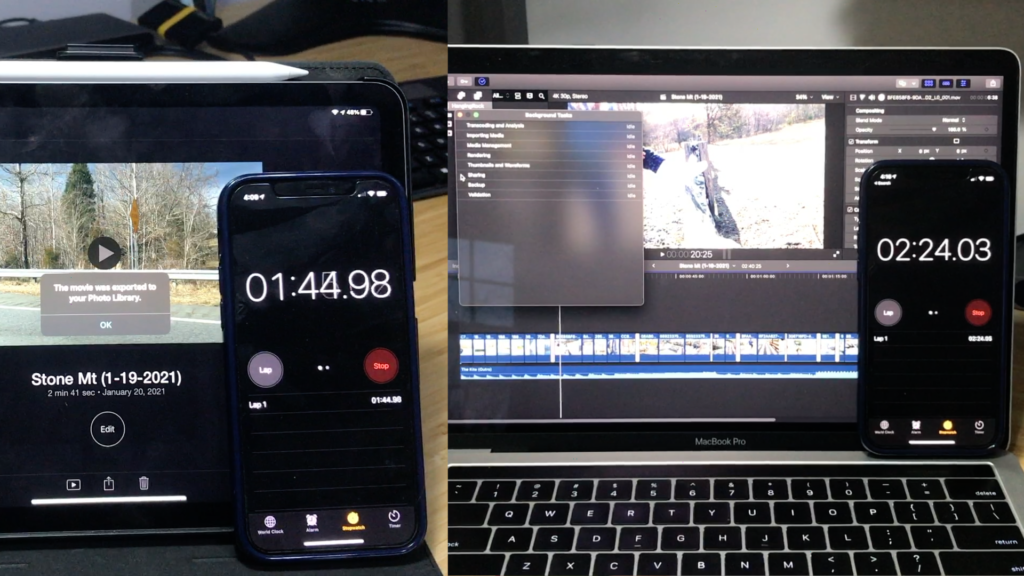
Exporting the video on the $800 iPad took 1 minute and 43 seconds, while the $3,000 MacBook took almost 2 and a half minutes. This may not seem like much of a difference, but with a more intensive and longer video time adds up.
This experience has solidified my thought that high-end video editing can be done on a mid-tier iPad, and LumaFusion can bring the experience to the pro level.
I would like to end with this thought. We see the incredible performance Apple has packed into their iPads and iPhones. This only makes me more excited to see what Apple has in store when they bring this same technology to the rest of the Mac lineup.
Model: Theresa McGowan
Song: The Kite by Blonde Maze
Links
Vocab:
- Wikipedia: Frames Per Second (FPS)
- Wikipedia: Dynamic Range (DR)
- Wikipedia: Standard Dynamic Range (SDR)
- Wikipedia: High Dynamic Range (HDR)
- B&H Explora: Dynamic Range Explained
- Wikipedia: Dolby Vision
- Dolby Laboratories: Dolby Vision
- Wikipedia: Display Resolution
iOS Video Editing Apps:
- Apple.com: iMovie
- App Store (iOS): iMovie
- App Store (macOS): iMovie
- LumaFusion.com
- App Store: LumaFusion
Linus Tech Tips: Techquickie
Subscribe: Apple Podcasts | Google Podcasts | Spotify | Amazon Music | Android | Pandora | Blubrry | Email | TuneIn | RSS | More