
Last week we took a look at what HomeKit is and why it’s so great, especially if you’re are heavily invested in the Apple ecosystem. Unfortunately, as great as HomeKit is, most smart devices don’t support Apple’s smart home ecosystem. So, today, we will look at how to make any Alexa or Google Home smart device a HomeKit device.
I want to start by saying this is not a simple fix. There is no switch to be flipped nor a little adapter you need to buy. Instead, we will need to create a server. Now, this may sound overwhelming, but I promise I will make this as simple as possible.
So here’s a quick overview before diving into the details. To get this to work, we will need the help of a free open-source app called Homebridge. Homebridge is a smart home server that runs on practically any computer. Here’s how it works. You download the software on your computer, open it up, log in to the admin account, and start adding skills, just like you would with Alexa or Google Home. Then, scan the barcode on the homepage, and viola, your devices are now HomeKit devices. But, don’t worry, they have detailed directions for how-to install Homebridge on every supported platform.
With that quick summary out of the way, let’s get started.
As I said before, you can install Homebridge on practically any computer. The only thing it needs is some form of internet connection. However, it needs to be a computer that is always on and connected to your home network because if it disconnects, you will lose HomeKit access to your devices. For this reason, I’ve opted to purchase a new computer for this project.
This is the Raspberry Pi Zero Wireless, a $10 computer smaller than a credit card. The Zero Wireless comes equipped with Bluetooth and WiFi and enough punch to host this server. Along with the Pi, you’re going to need a power supply, in this case, a micro USB charger. And for storage, you will need a micro SD card. You can purchase all three of these separately or all together in a bundle if it’s easier. As for me, I already have plenty of micro USB cables lying around so, I skipped that step. For storage, I picked up this PNY 32GB micro SD card. However, any micro SD card will do.
With all the supplies round up, it’s time to get busy.
So, to get started, go to the Homebridge website. Then, scroll to the directions at the bottom of the page. If you’re using your own computer, choose your platform from the list, like macOS or Windows 10. As for me, I’m going to click “Getting Started” under the “Download Homebridge Raspberry Pi Image” button. This will take us to the directions on how to configure the Pi. Now I’m just going to follow the directions, and see if we can get this working. If you run into any issues during setup, check out the links below for assistance. Homebridge has a very supportive community that can help you get back on track.
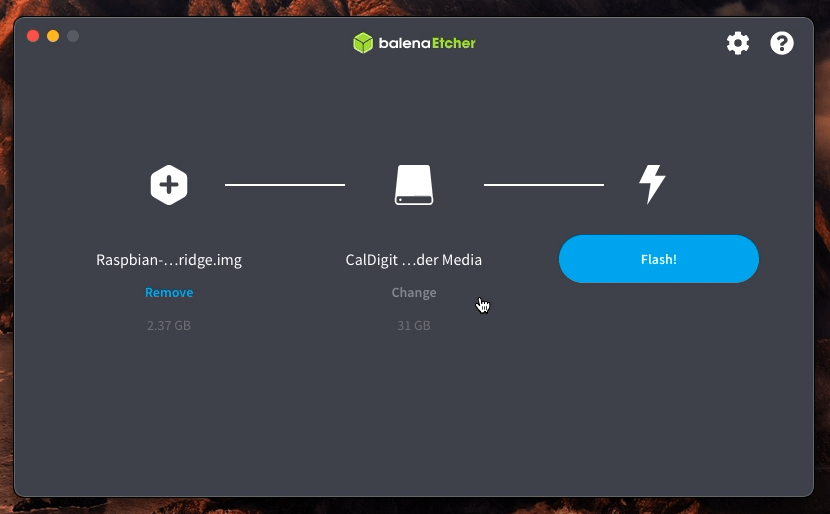
Step one is to download Homebridge for Raspberry Pi. This download is a disk file with Homebridge preinstalled and configured. While it’s downloading, we can pop over and download Etcher. We will use this software to burn the Homebridge disk file to the SD card.
With both Etcher and Homebridge download, you are cleared to insert the micro SD card into your computer and open the Etcher app. Now follow the steps in Etcher by choosing “Flash from file” and navigating to the Homebridge file, and choosing your SD card as the target drive. Then, flash.
Once Etcher is finished flashing the SD card, you’re ready to drop it into your Raspberry Pi. Give it some power using a micro USB cable and USB power adapter.
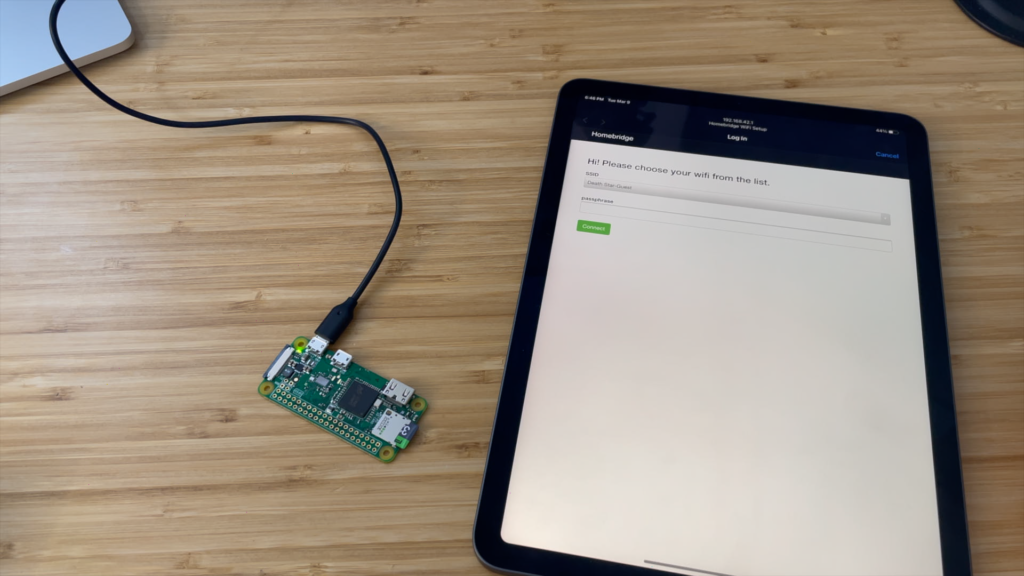
From another device, open your WIFI settings and choose Homebridge WiFi Setup. If it doesn’t show up immediately, give it a couple of minutes to completely boot up.
After you connect to the Pi’s WiFi network, you will be prompted to choose your home WiFi network and enter your password. Once again, give it some time for everything to connect.
Up next, you need to figure out how to connect to the Pi. The first thing you can try is by going to homebridge.local. If that doesn’t work, you will have to put in a bit of work. The Homebridge guide recommends installing the Fing app on your iOS or Android device, which will give you a readout of all of the devices connected to your network. Try finding a device called Homebridge in the list. With it should be an IP address that looks like 192.168.1.77.
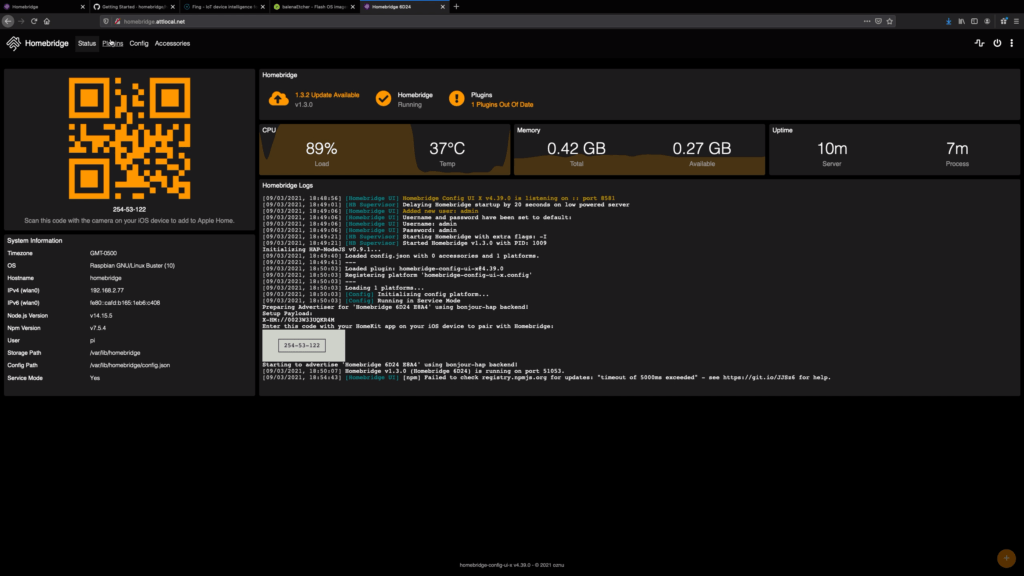
So, enter that address into a browser, and you’re ready to get started. When you reach the login page, use admin as the user name and password.
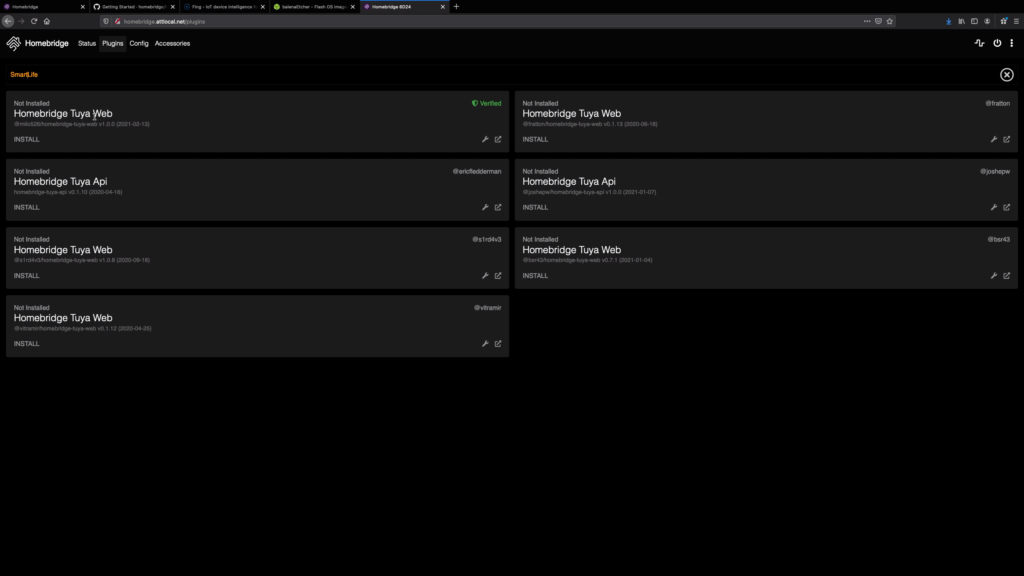
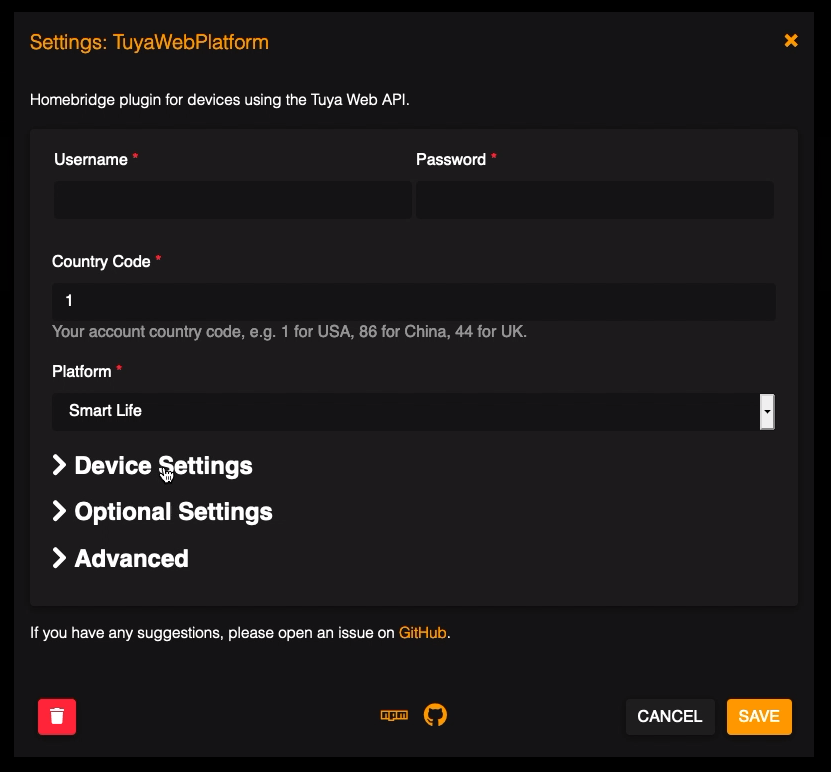
Now, this is where things start crossing over with Alexa. So, click on the plugin tab on the top menu, and in the search bar, look for apps needed to control your smart accessories. For instance, all of my smart bulbs use the Smart Life app, so I’m going to search for that skill. This is just like installing skills with Alexa or Google Home. Depending on your smart ecosystem, you may get multiple search results. So, make sure you read the description and check for a verified tag to make sure you’re downloading the correct one. Once installed you, may be prompted to configure the plugin. Here you would enter your login info for that app. However, others may require you to manually configure the plugin. If you click on the box with the arrow, you will be taken to the documentation for that plugin to help you get started. Either way, I recommend installing and configuring all of your plugins first.
With all your plugins installed and configured, hop back over to the status tab. Now you can open the Home app on your iPhone and scan the bar code-as if adding any other device. Then, assign each device to a room and answer any other questions HomeKit may have for you.
Now, I want to may my setup a little nicer. I don’t want to have this computer laying around. So, I’m going to fit it in this metal chocolate box. Now, if you purchased a bundle, it probably came with a case so, you can skip all of this. In most cases, it’s not recommended you put a WIFI device in a metal box. But, since I’m setting the Pi right next to my WIFI router, it shouldn’t be a problem. So, I’m going to cut the anti-static bag and use it as a bottom liner, and tape it all together. Then, I’m going to fish the micro USB cable through the hole that I cut earlier. With that, Homebridge is ready to go!
Now, what used to only support Alexa or Google Home, also supports HomeKit. You can now use the Home app on your Mac, iPhone, iPad, Apple TV, or Apple Watch to control your devices. You can add quick access controls to Control Center on iPadOS and iOS. Lastly, you can use Siri from any of your devices to control your smart accessories.
Now the question is, how well does it work? My initial thoughts, pretty well. Occasionally a device will lag when given commands through the Home app, and the Home app takes some time to update sometimes. But overall, I think it’s been a positive experience to be able to more securely control my smart devices via the Apple ecosystem over the Amazon or Google ecosystem.
So, what did you think? Did this go over your head? If so, you’re not the only one. I got stumped a couple of times too. But, with the help of the Homebridge Reddit community, all the answers are out there. So, are you going to try this at your home?
Links:
Homebridge Resources:
- Homebridge Homepage
- Homebridge Directions
- Homebridge on Reddit
- Homebridge on Discord
- Homebridge on Github
Apple HomeKit Resources:
➤Apple Guide Web: Apple’s Alexa & Why It Matters (What is HomeKit?)
➤Apple Guide Web: Is Smart Tech Worth the Hassle?
➤Apple.com: Homekit
Subscribe: Apple Podcasts | Google Podcasts | Spotify | Amazon Music | Android | Pandora | Blubrry | Email | TuneIn | RSS | More