
iMessage is the messaging service built into the Messages app. Those are the blue messages that you send and revive from other fellow Apple users. iMessage is available on macOS Mountain Lion and iOS 5.0 and newer Apple devices. These messages are different than SMS, or short messages service because as I stated earlier they only work between Apple devices, but they also require an internet connection via your data plan or Wi-Fi.
iMessage Settings
iOS
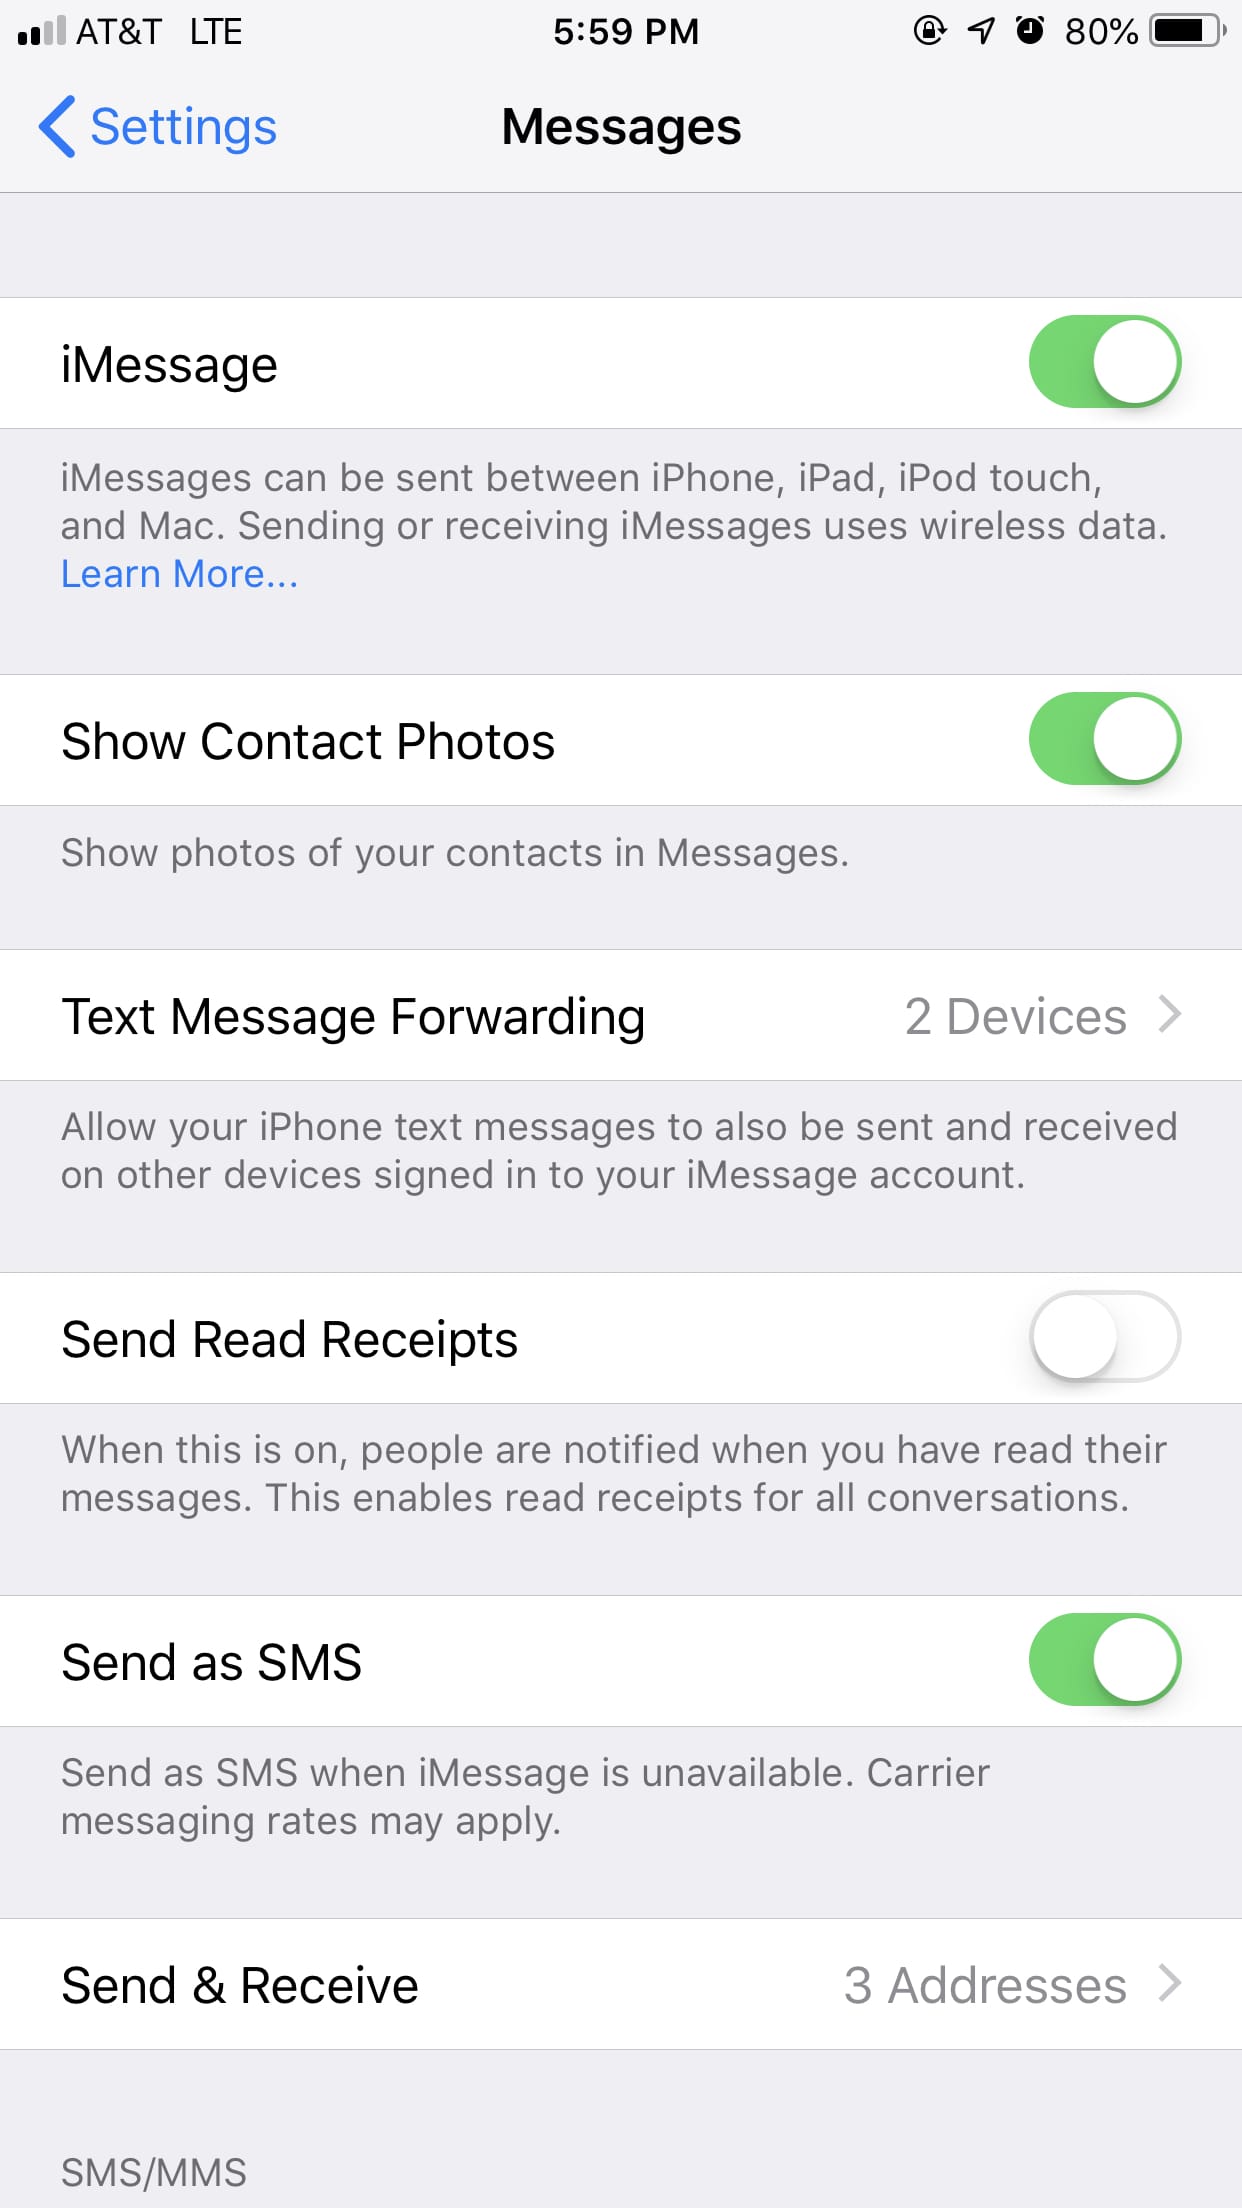
To get to iMessage settings on iOS go to “Settings>Messages”. Turn on iMessage by flipping the top switch. Then click on “Send and Receive” and sign in with your AppleID if you haven’t already. A list of phone numbers and emails that are associated with your AppleID will appear. A checkmark identifies a contact email or phone number that is used with iMessage. The top group in ways that people can contact you and the bottom group is the one phone number or email that you use when you start new conversations. iMessage uses the same settings like reading receipts, text message forwarding, and show contact photo as standard messaging which you can change by going back into message settings.
macOS
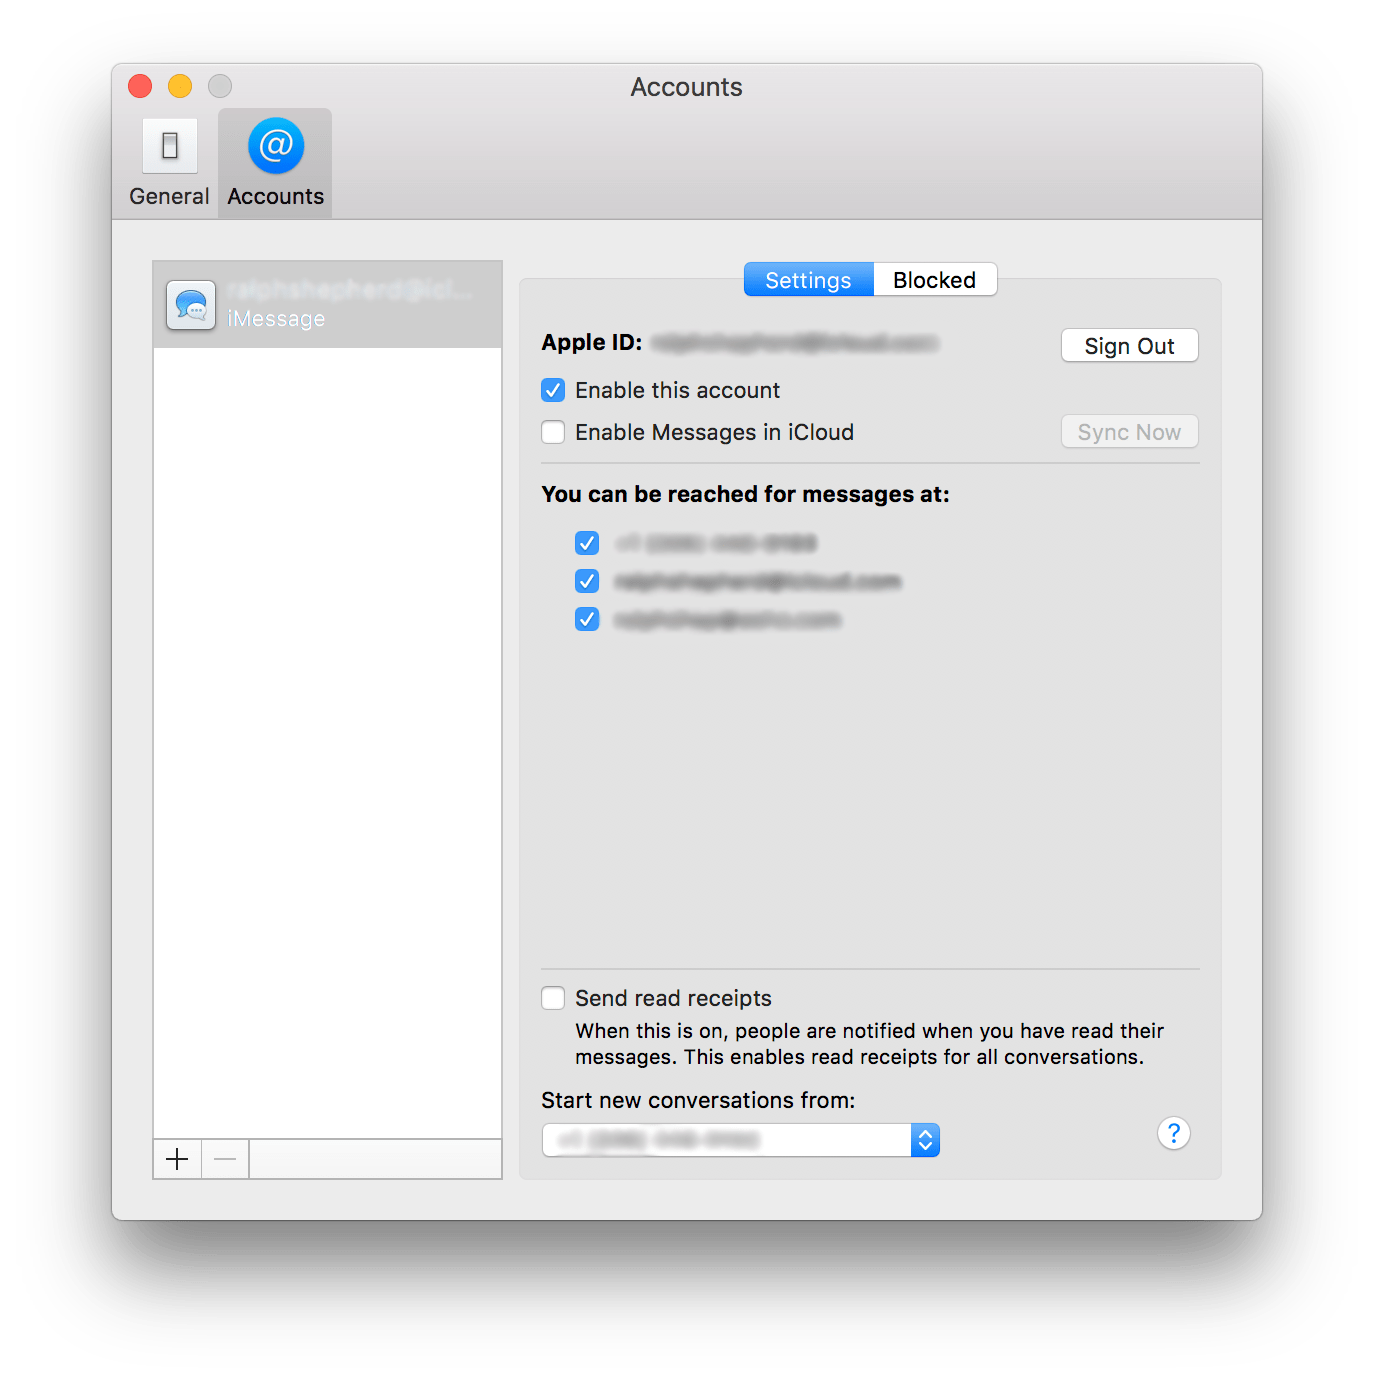
On macOS open the Messages app either from the dock or from the applications folder. Once opened click on the “Messages” drop-down menu then go to “Preferences” and click on the “Accounts” tab. If you haven’t already sign in to iMessage click on the plus (+) at the bottom of the left sidebar and sign in using your AppleID. Click on your account on the sidebar, account settings will appear on the right. At the top, you can click “Sign Out” to sign out of your messages account. Beneath that, if you are running macOS 10.13.5 or later you have the option to sync your conversations to the cloud. Use the checkmarks under the “You can be reached for messages at:” to choose which ways people can contact you either by listed phone number or email.
Helpful Links:
Subscribe: Apple Podcasts | Google Podcasts | Spotify | Amazon Music | Android | Pandora | Blubrry | Email | TuneIn | RSS | More