
To check your email using your iMac or MacBook you could just use your internet browser. Open Google Chrome, Safari, or Firefox go to your email providers site sign in and there you go. If you have more than one email you may have multiple tabs and a huge confusing hassle. Minimize the hassle by using the macOS app Mail for all of your email traffic.
Mail can be found on the dock of the typical Mac if it is not there then check your applications folder. This is where you can find all of your mail accounts. Now if you’re just starting out you may not have any accounts already set up, other than maybe iCloud.
Step 1
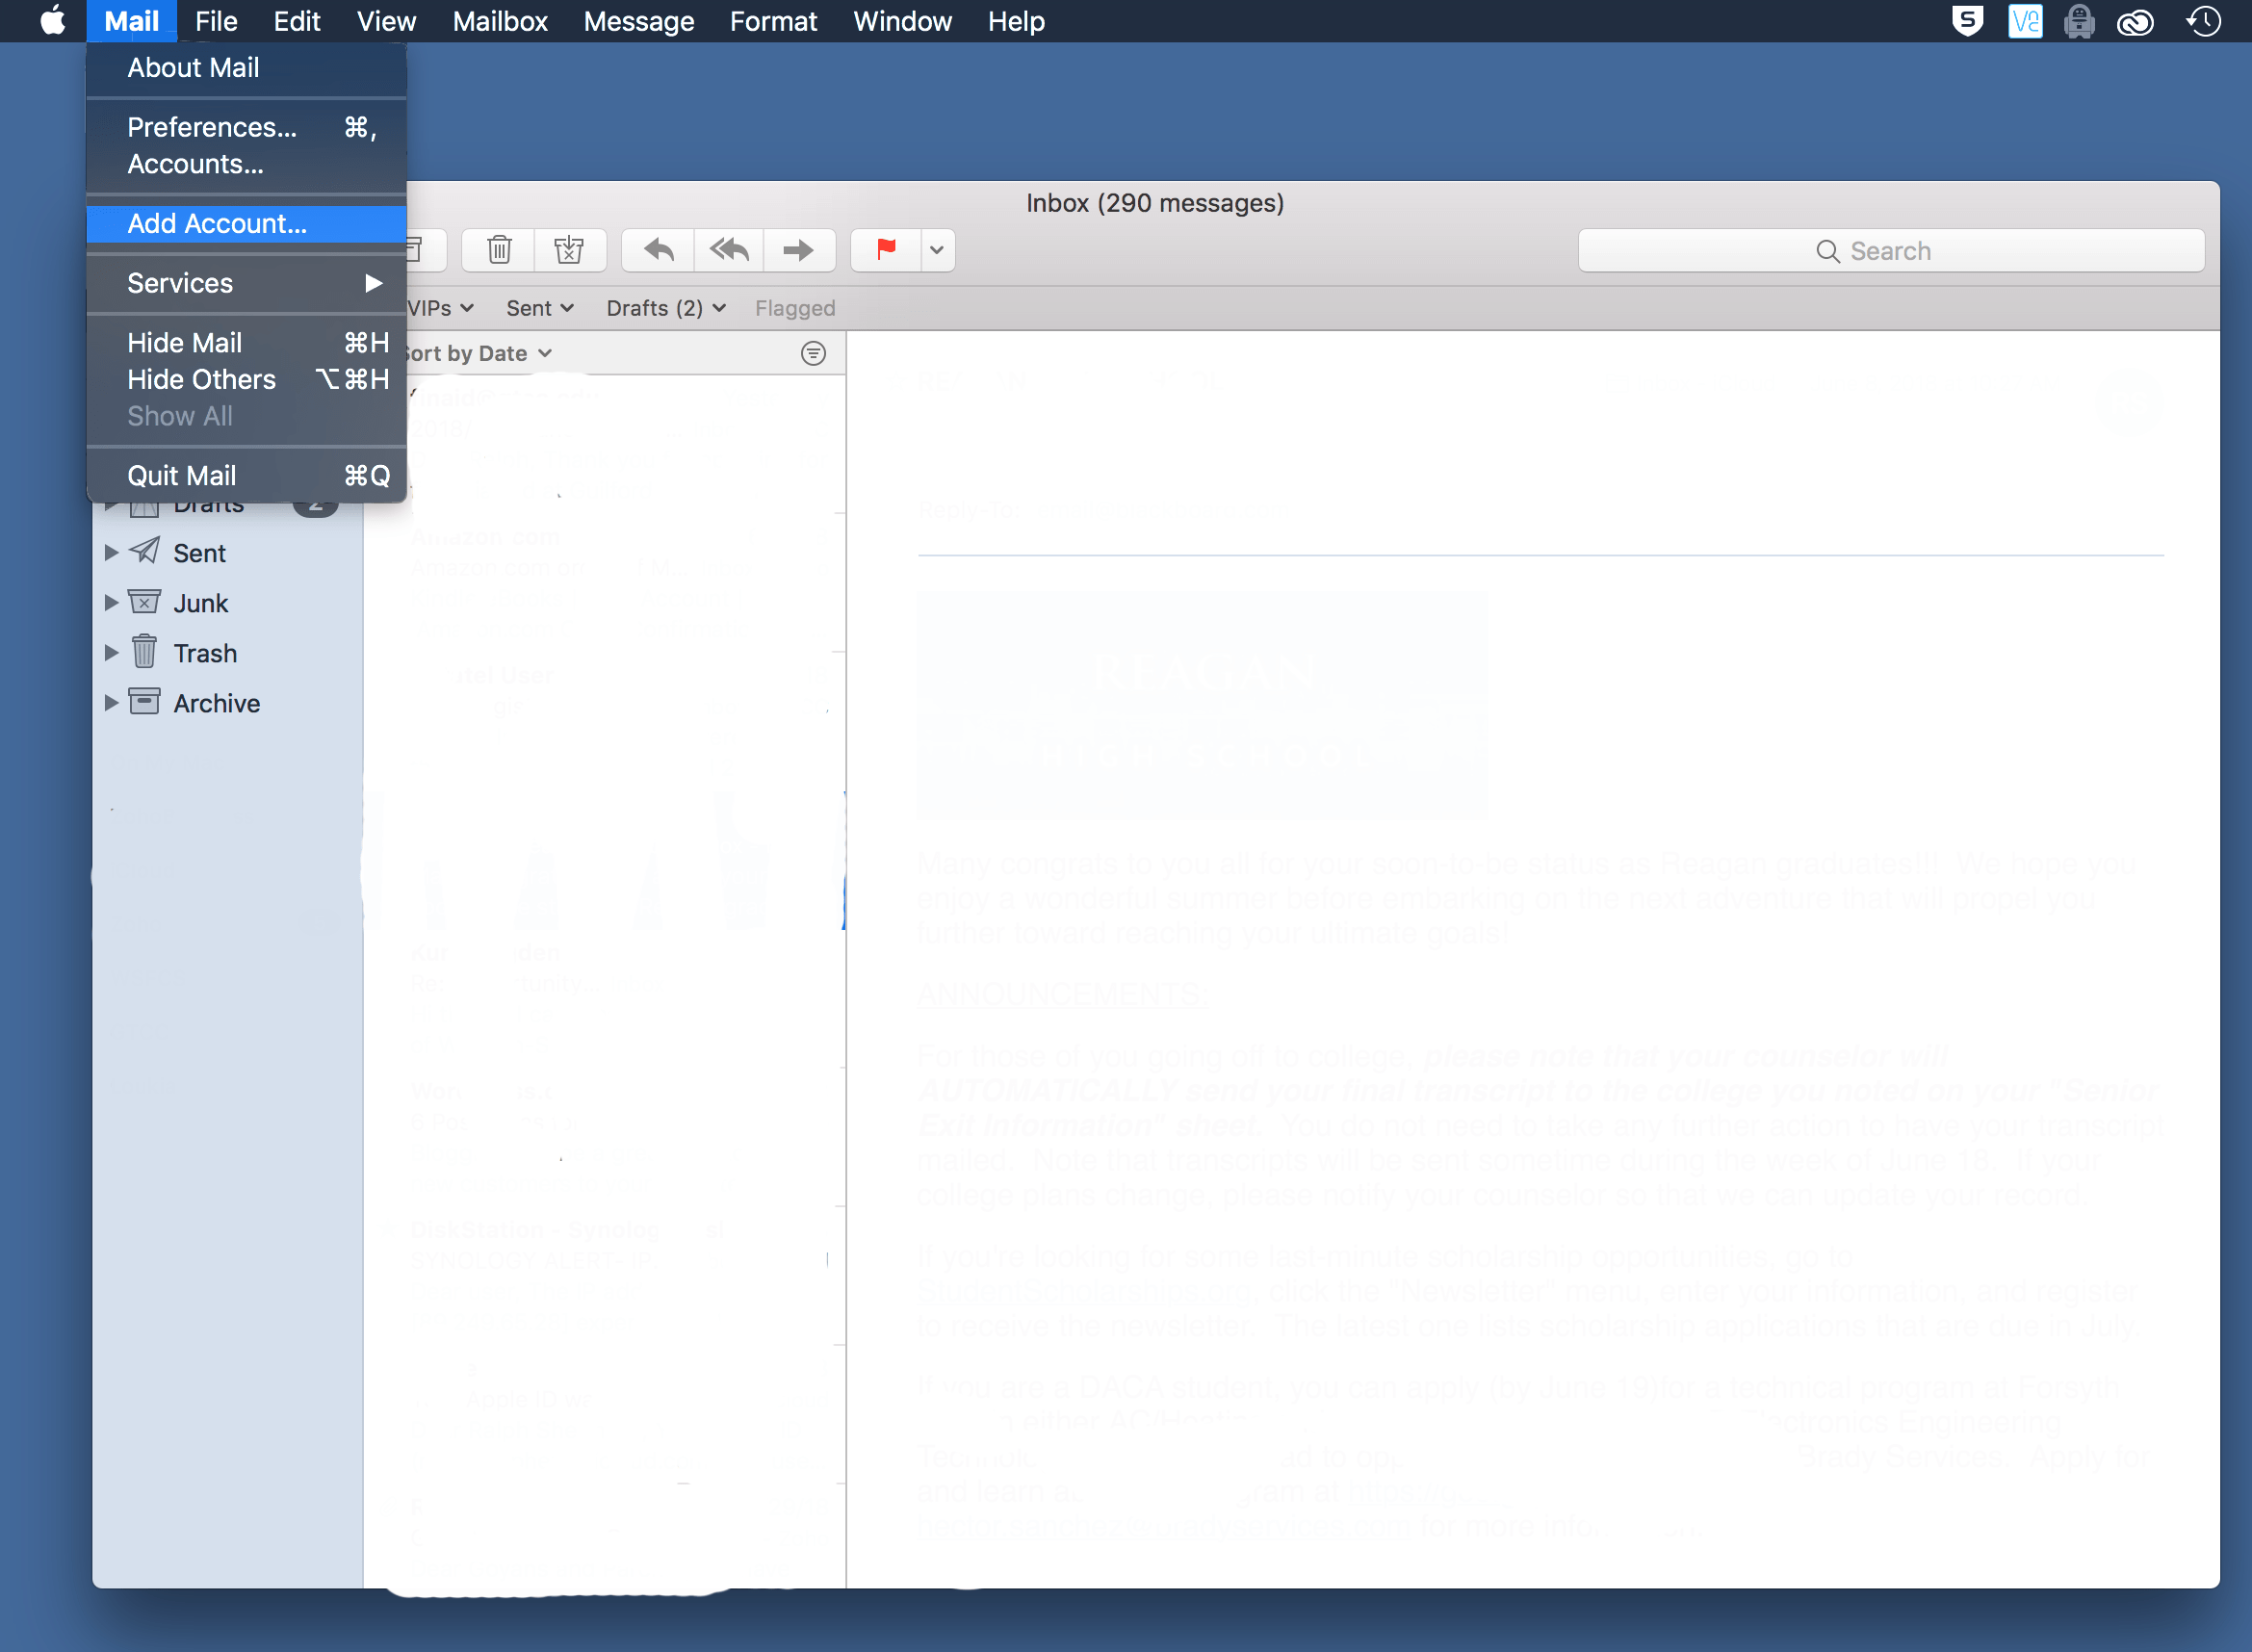
To add an account click on the “Mail” menu then go down to “Add Account”. Alternatively, you can access the same menu by opening “System Preferences” then opening the “Internet Accounts” preference pane. Then click the plus at the bottom of the left menu list.
Step 2
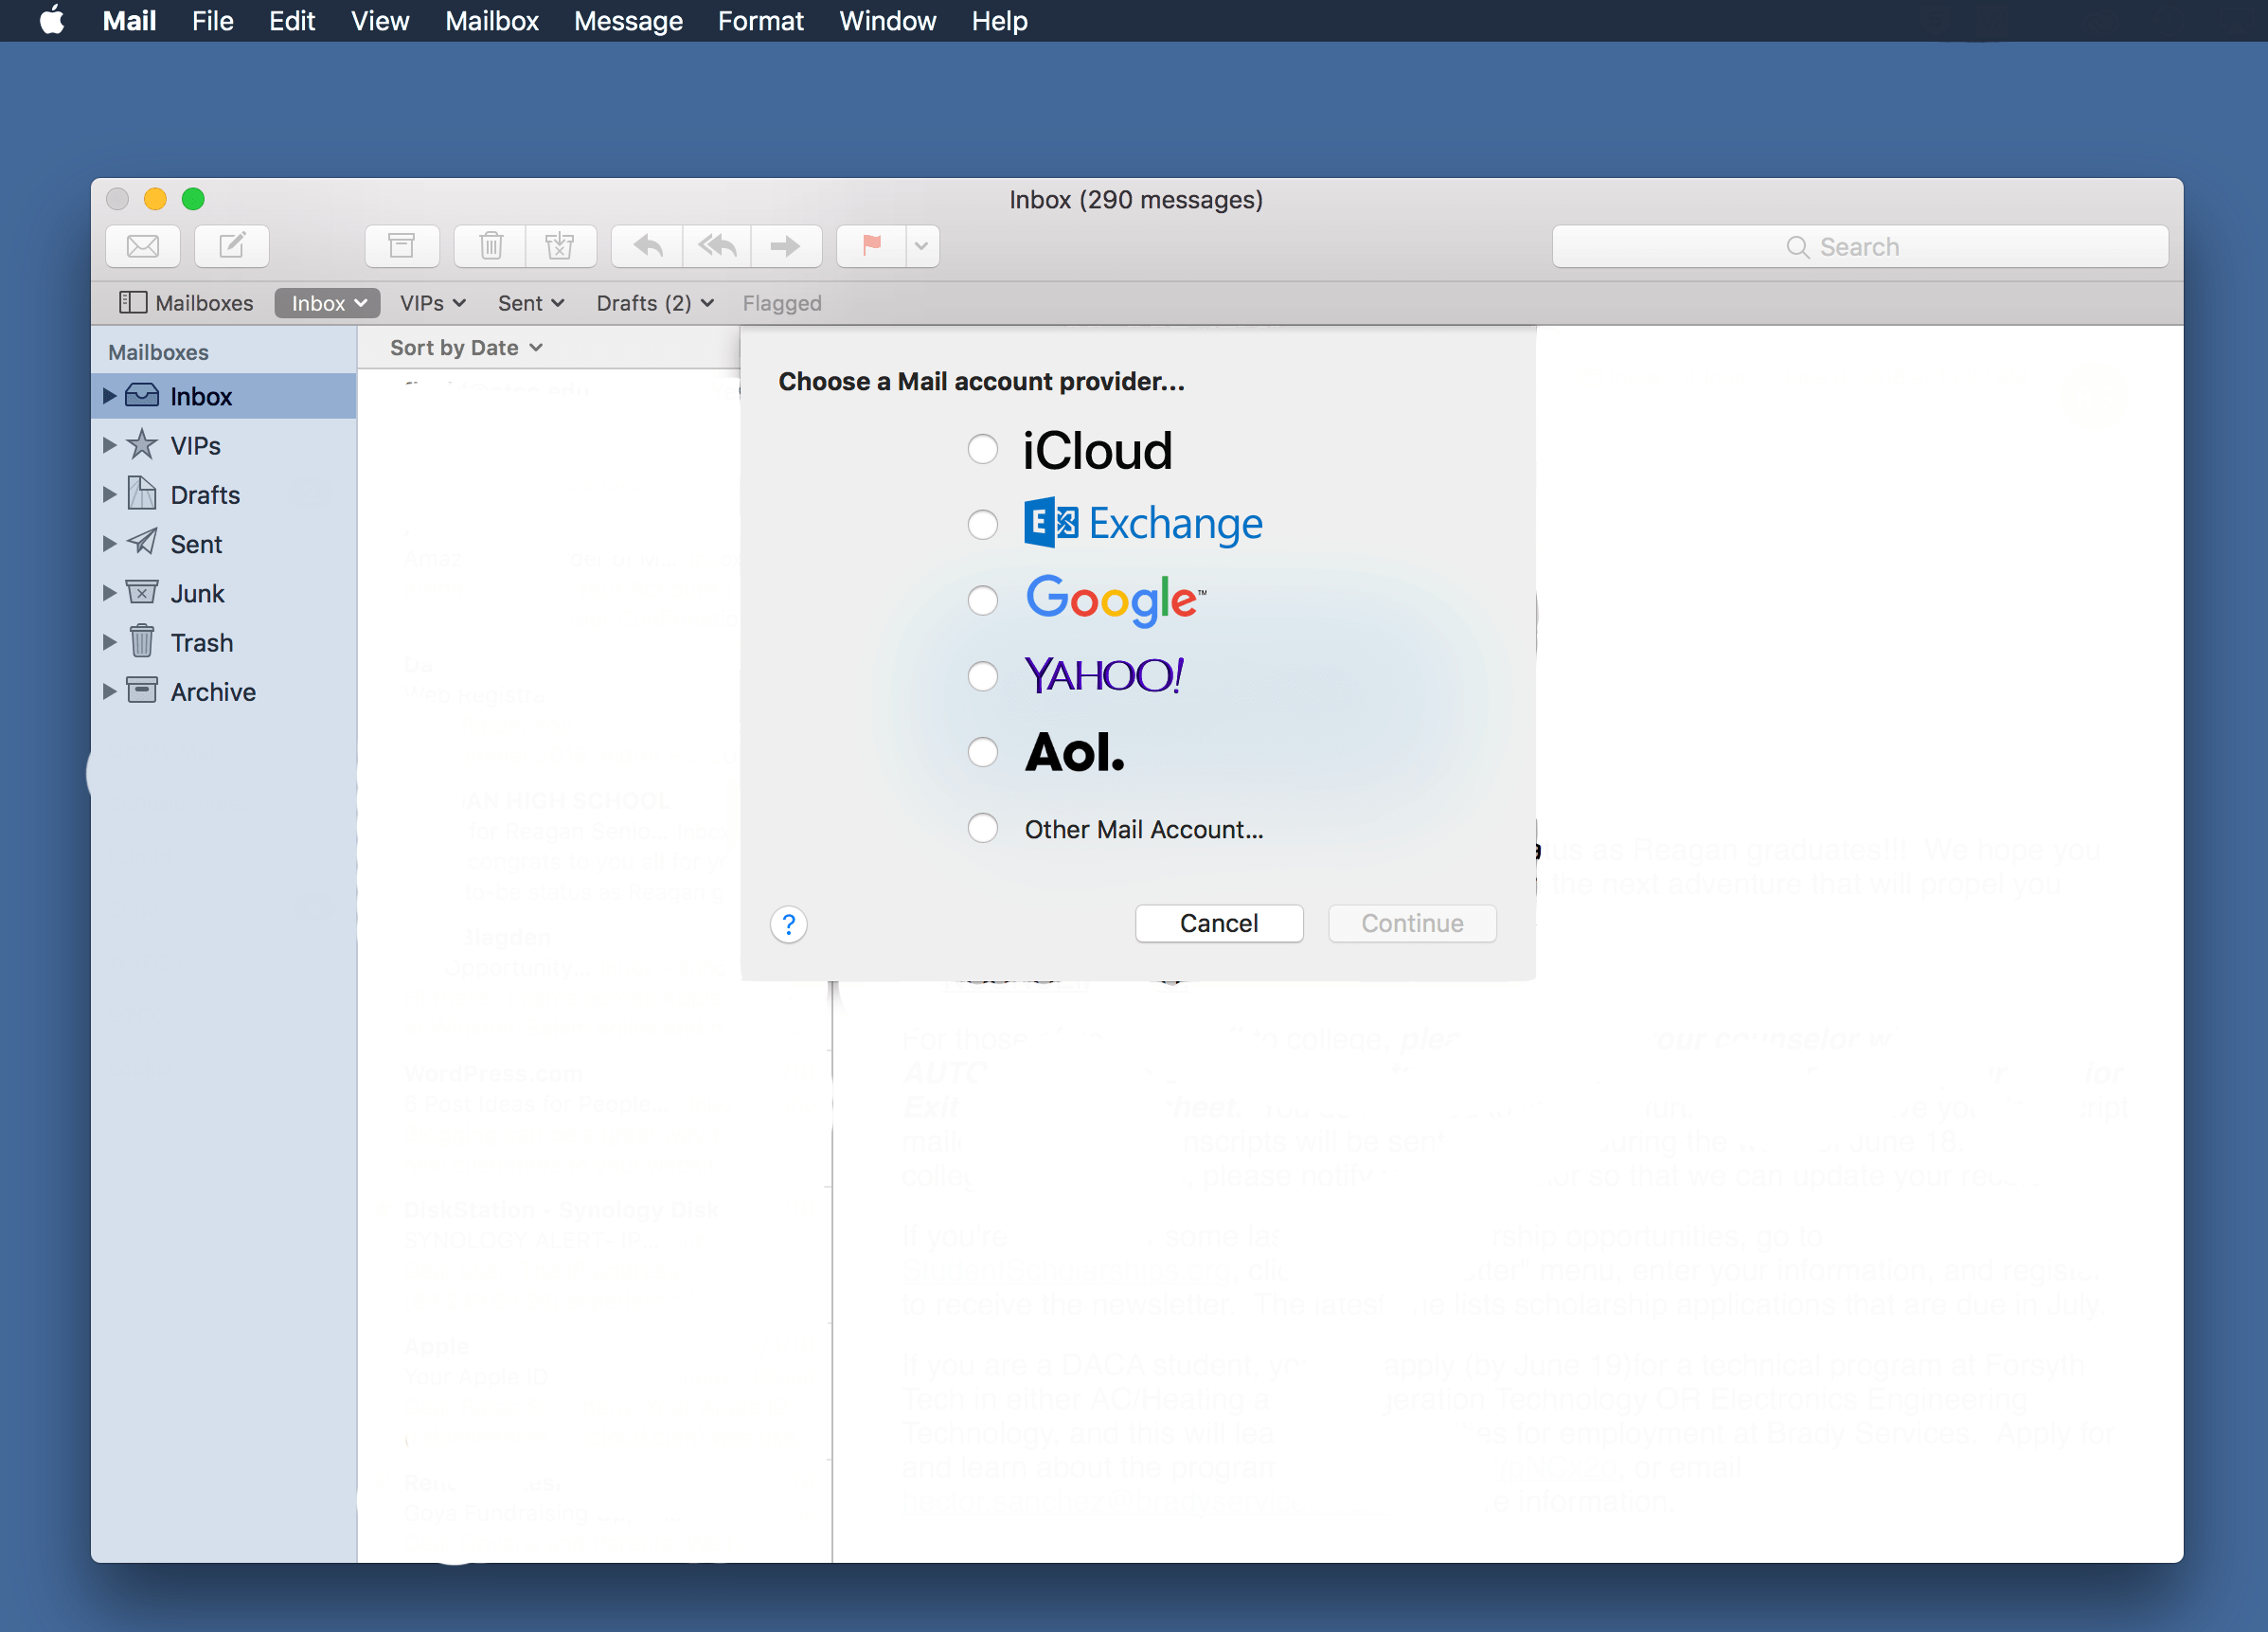
In the menu that appears you can choose from the following options by clicking the bubble to the left. Then just use the easy sign-in and your account is ready. If your account is not listed you have to do a little more work.
Step 3
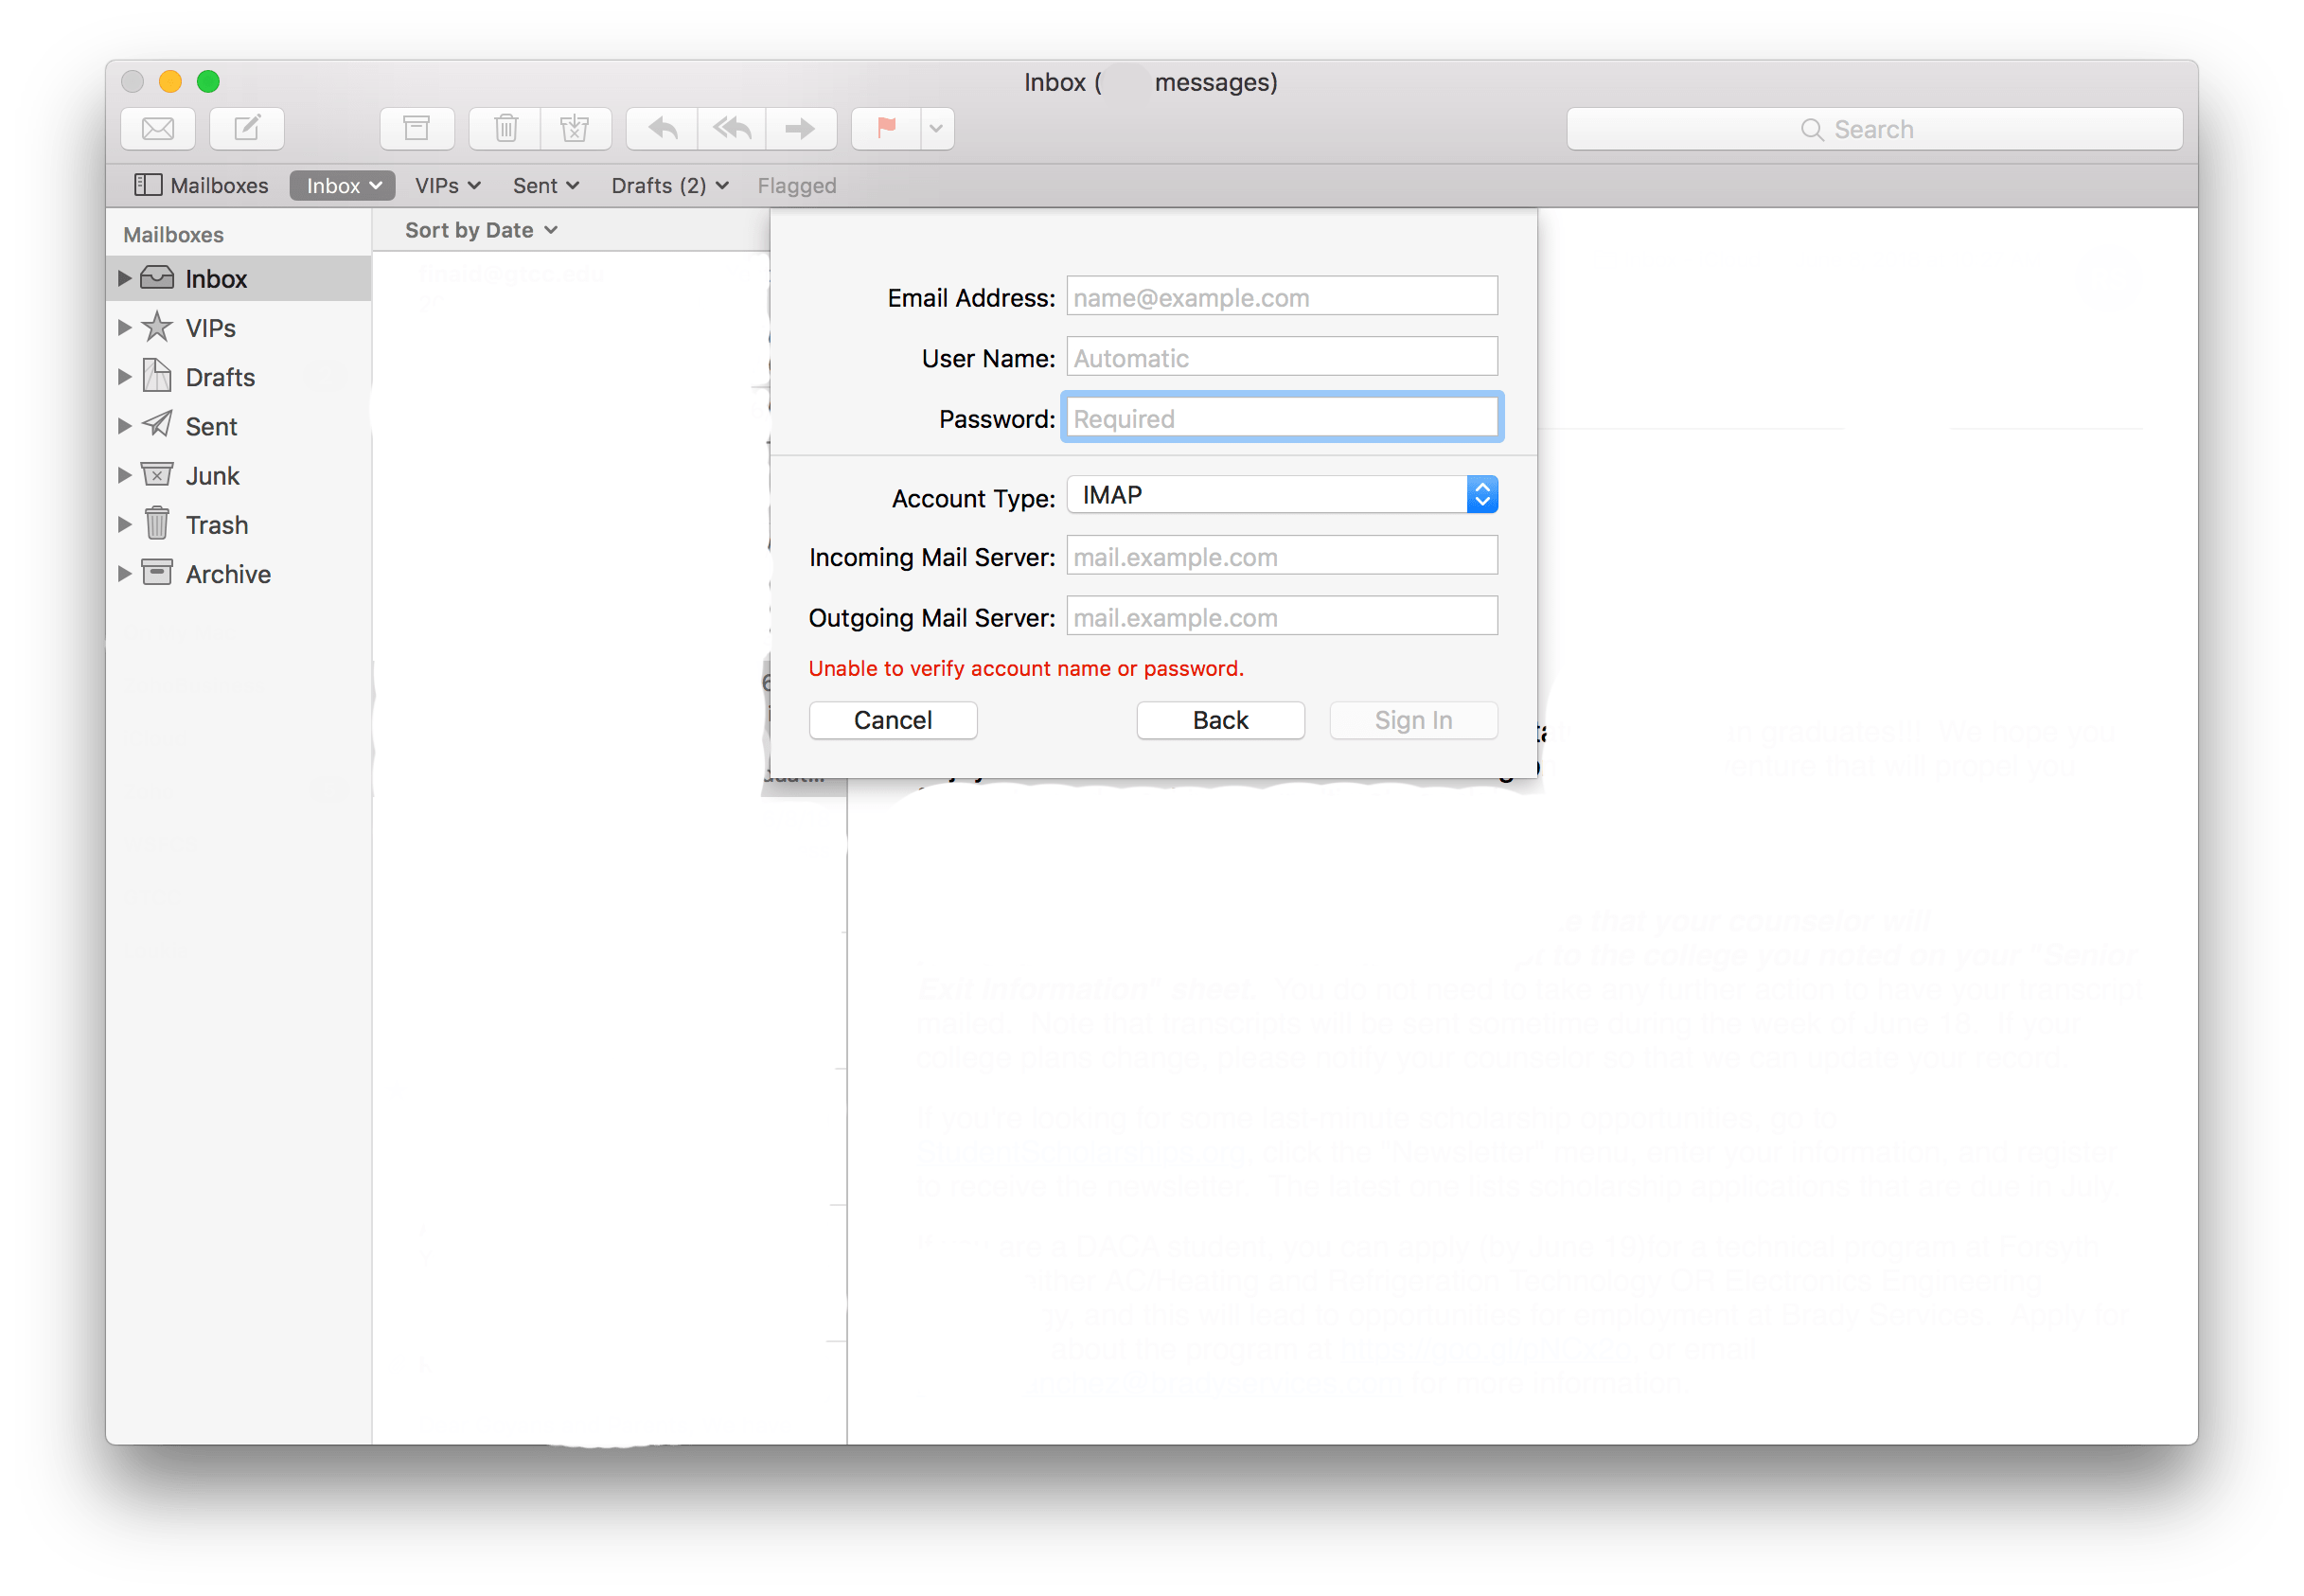
If your account is not listed click on “Other Mail Account…” Then sign in to your email. Now you will need to track down your mail’s incoming, IMAP, and outgoing, SMTP, mail servers. The best way to do so is to Google it. For example, if you have a Yahoo account Google “Yahoo IMAP server” then do the same thing for your outgoing mail server. Then click sign in. If you run into any issues make sure that you typed in everything correctly like your email, password, incoming, and outgoing server, and any other fields that may be required. If an issue persists contact your email provider for a solution.
Helpful Links: